NYC Gondola by Jim Six

Jim Six has been a model railroader since he was a kid (as have I). Since we’re both the same age, I can tell you, that’s a lot of years! Jim has been a prolific modeler over these years, and many of you have probably come across at least a few of the many modeling articles that he has produced in various model railroading magazines.

Jim recently retired and he has decided to re-think his layout. Part of that thought led him to make the decision to redo (and scale down) what he was in the midst of doing. And another major change was his decision to move to an earlier time frame for his modeling. He decided on the year 1927, and his plan is to model a single town, Sturgis, Michigan.

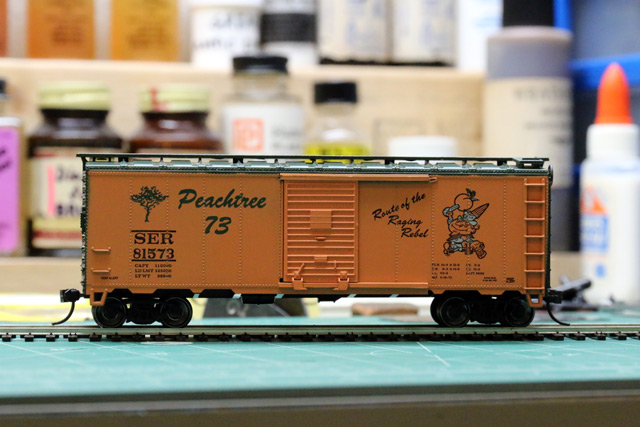
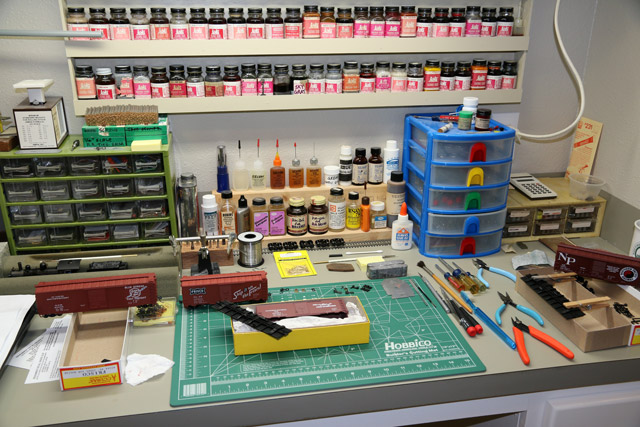
One of the bi-products of this era decision was the realization that much of his rolling stock was just too modern for his 1927 date. Jim participates in the Model Railroad Hobbyist forum, and has shown photos of several of his inexpensive, but beautifully weathered cars. One of the cars that he has shown is a New York Central gondola. It’s an Accurail kit, and the only modification to it was to substitute metal stirrups on the corners for the stock cast on plastic ones. He also equipped the car with the smaller size Kadee couplers. But the big addition was the weathering job that he did on the car. This is proof of something that I’ve believed for a long time: even an inexpensive plastic car with all it’s cast on grab irons, ladders, etc. can still look wonderful at normal viewing distances if you know how to paint and weather the car. The photo below is that car.

Jim Six NYC Gondola

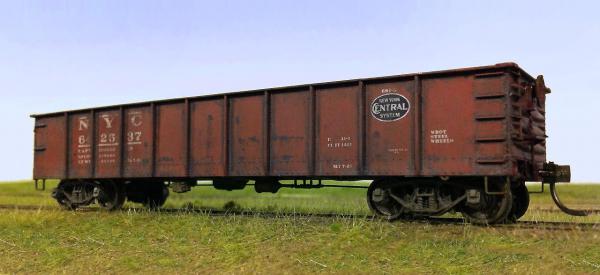
Jim has done quite a few cars like this, and all the photos I’ve seen of them look absolutely wonderful. But here’s the best part (for me). Jim and I have struck up a long distance friendship, and he recently gifted me this “too modern” NYC gondola as a “birthday present”. It arrived early this week and I’m totally elated with it. And I think it looks even better than the photo. I’m proud to be the new owner of this car, and it’ll one day see service on the Louisiana Central.

Thanks, Jim!

-Jack

A Set-up for My LokProgrammer

I mentioned recently that I had acquired a new LokProgrammer during their summer sale.  The device is only about 4″ square and when connected, has three cables attached to it.  However, I found it a bit awkward to handle all of this while using it.  So I took a short break from layout construction and cobbled together this little programming board for my programmer.  It makes it easy and portable to set up for programming a loco.  Here it is plugged into my train room computer:

LokProgrammer_Board

I attached a piece of track to the board with track nails and small screws.  The screws also serve as wheel stops in case the loco inches too far towards an end.  The LokProgrammer, at right, is also fastened with a screw through the hole in it’s center.  I didn’t want to torque down on the screw for fear of damaging the plastic case, so I glued a couple strips of thin rubber to the case bottom.  Now the programmer won’t have a tendency to rotate around the attaching screw.  The track connections make it easy to connect/disconnect if needed.  And the board sits on some little rubber feet so it doesn’t slide around.  The power supply and USB cable are stored in a small plastic case (not shown) when not in use.

I’m pleased with the result, and it made for an enjoyable change of pace this week.

-Jack

About Those Distractions

In the last post Spencer Sawmill Trackage Complete I mentioned how I kept getting distracted from my trackwork mission in Oneida.  It started when the folks at ESU announced a summer sale for their LokProgrammer.  For the benefit of those not familiar with this device, it is a LokSound decoder programmer that uses a computer interface.  While DecoderPro will program LokSound decoders nicely, this programmer has one interesting benefit that DecoderPro can’t match.  You can download new sound projects from ESU, then load them into your LokSound decoder.  I’m new to LokSound, but I’m quite impressed with their offerings at this time.  Several months ago I purchased my first LokSound decoder and it came loaded with the sounds for an ALCO 244 prime mover.  Then a few weeks ago, ESU upgraded the decoder file for this prime mover to include their new Drive Hold, and several other operating features.  No problem . . . just download the new file, and write it to the decoder.  It is now the latest and greatest.  Lured by this prospect, I decided to take advantage of the sale.  My first task was to upgrade my (still new) decoder.  It went well, and I’m tickled with the result.  Then I found out that I could actually modify the sounds in the LokSound decoder that came in my Rivarossi Heisler (it’s the top-of-line version 4 decoder).  Wow!  I spent several days playing with that and I’m thrilled with what I was able to do.

I also became distracted with my waybill generation program.  Back in the early 90s I cobbled up a DOS based waybill generation program using QuickBasic.  It worked quite well on my small bedroom sized layout of the time.  Then later I decided to write an enhanced Windows version using Visual Basic 6.  I’ve played with that program off and on (mostly off) for years now, and have thoroughly enjoyed working with it.  The program is about 85% complete, but lately I’ve been thinking that it’s high time to get busy and finish the thing up so that it’s ready for use when the layout becomes operational.  Trouble is, I haven’t done much with it for at least 5 or 6 years, and find that I’m spending a good deal of time trying to figure out everything I’ve already done!  To complicate matters, I recently started reading the detailed writings of Tony Thompson on the style of waybills that he and friends were developing and using (I originally saw an article he did in Model Railroad Hobbyist, then later visited his blog where his entire ongoing treatise of the subject is available).  They’ve come up with some interesting “model railroading” waybills that bear a nice resemblance to actual waybills.  They’re greatly simplified to be sure, but they capture the essence of the real thing, and I love them!  Indeed, they have prompted me to completely redesign the appearance of my waybills, and to expand on the concept.  Creating the forms was easy, but then I realized that I needed to add quite a few fields to my database to fill in all the new blanks on these new forms.  And then the code to make it all happen.  I’m not finished with this conversion by a long shot, but I’ve made good progress with it, and think the finished product will be well worth the effort.  The downside to all this was, of course, adding another delay to the program completion.

And that led to yet another distraction.  The new waybills will be printed on 3″ x 5″ slips of paper (I’ve found a source for this paper size and my HP printer can handle it).  Problem is, the larger than “normal” waybill size requires a larger than normal box on the layout fascia to hold them.  I could of course make them myself, but I’ve taken a fancy to the nice boxes that are offered by Bill Brillinger up in Canada.  I contacted Bill and he says he can make up any size that I need.  Excellent.  But after some email exchanges, I realized that I needed to do more homework as to exactly what I’ll be needing (sizes, number of slots, etc.) so that Bill can work up a quote for me.  It was then that I realized that I was doing everything that I wasn’t supposed to be doing (at this time) and I pulled in on the reins.

I got back on the trackwork at Oneida, and I stayed there until the job was completed.  The only trackwork left to do (on the peninsula) is a bit of mainline on the backside of the peninsula that brings the trains from Oneida into Monterey.  I’ll be starting on that soon.

Now, where did I put that programmer?  And I really need to get back to Bill on those boxes…

-Jack

High Line Completed

The Spencer “high line” to the re-load point at Camp 6 is now complete.  All track is laid, wired, and operational.  As I mentioned in the previous post, I’ve sprayed a coat of Rust-Oleum Camouflage Brown paint over the track.  Later when I start doing scenery work, I’ll go back and paint ties in several other shades of brown and grey, and I’ll weather the rail with a rusty brown color.  I still have to connect the Tortoise switch motors to the panel toggles, but that will have to wait until the panel is constructed.

Next up is the double switchback which will bring the rails down from the hill to the valley below.  This past weekend I got the sub-roadbed for the double switchback cut out and the riser assemblies constructed.  Then I temporarily clamped the risers to the joists and set the sub-roadbed on top.  I’m playing with the grades and I’ll screw everything down once all is tweaked to my satisfaction.  By next weekend, track should start going down on that section.  Then the long mainline will proceed through Whitcomb and on to Oneida where the sawmill is located.

The Louisiana Central mainline can also start to progress westward out of Maynard once I’ve completed the switchback trackage.

It sure feels good to see benchwork and trackwork progressing again!  Stay tuned for more.

The only disappointment this past weekend was with my Bachmann 3-truck Shay.  I decided to put it though its paces with a string of cars.  I was surprised to see it struggling to pull the seven car train up the grade!  Upon close examination, I noticed that one of the six driving axles was not turning at the same rate as the others.  On the third ascent up the grade (with one fewer cars), I heard some popping noises come from the locomotive.  Then it quit moving.  Again I examined it up close and noticed a second axle was not rotating properly.  Bottom line . . . my Shay apparently is victim to the dreaded Bachmann split gear syndrome.  This isn’t good news at all as I’ve read that Bachmann no longer has replacement parts for the Shays.

But there was a bright moment.  I put the Rivarossi Heisler (acquired last year) on the track, and she hauled the full seven car train up the grade without slipping.  Good show!  At least I still have a way to haul the logs out of the woods, albeit not with the intended power.

-Jack

Progress on Multiple Fronts

I have to admit that I’ve been in a rut for quite some time at least in regards to track laying.  And it all centers around the (self-imposed) requirement that all of the track switches are to be “DCC friendly”.  I’ve finally embarked on this project and can happily report that as a result, track work is again proceeding.  I’ve modified four of the Shinohara code 70 switches thus far, two of which have been installed.  The Illinois Central passing siding at Willis, and the interchange track to the Louisiana Central have been installed and are operational.  This completes the I.C. trackage.  The next two areas I want to complete are the L.C. passing siding at the Willis yard, and the Spencer Lumber Company’s line up to Camp 6 in the woods just east of Whitcomb.  The latter is necessary as it’s located at the far side of the benchwork in this area.  I want to get this installed and operational before advancing the Louisiana Central mainline (to be located near the aisle side of the benchwork) from Maynard to Whitcomb.

And since trackwork has resumed, I needed a fresh supply of refurbished and pre-wired Tortoise switch machines.  I grabbed another pile of those, performed the prep work, and now have them ready for installation.

I’ve decided to go with recessed control panels similar to what I mocked up recently.  There wasn’t much point to mocking up my other ideas as the recessed version was what I really wanted and the mock-up confirmed that the idea would be workable.  This past weekend Wayne and I cut out the components for the four panels that will be in the vicinity of Maynard.  I hope to start the actual construction of these panels within a week or so.  Once these are installed, I’ll be able to paint that section of fascia.  I’m studying color samples and hope to decide on a color soon.

I’ve also made a minor lighting change in the train room.  In addition to the fluorescent lighting behind valances, I also have recessed can lighting over the aisles.  These have had 75 watt incandescent lamps in them.  I decided to change the incandescent lamps out to 5000k LED flood lamps, the same color temperature of the fluorescents.  These match the layout lighting quite nicely and I think it will be a visual improvement.  I also installed a twin head emergency light fixture near the entrance to the room as when the lights are out, that room gets very dark (as in black).  Interestingly, the first day after I installed the light we had a heavy thunder storm pass through and the lights went out for a couple minutes.  The emergency light did an outstanding job of lighting the way out.

And finally, freight car construction continues, although at a slightly reduced pace.  I have about 45 cars assembled and checked out to be road worthy at this point.  Only about 250 kits remain.

-Jack

A Special Car

I just finished assembling this boxcar commemorating the 1973 NMRA National Convention in Atlanta.  My good friend Bill Williams had picked up this kit during that convention which he and I, along with a couple other guys, had attended.  Bill passed away a couple years ago and several months later, some other friends were liquidating a bunch of Bill’s railroad equipment during a railroading get-together and banquet.  We found this car in the box and I just had to have it.

SER Boxcar

The car is an old blue box Athearn that the NMRA had specially made up for the convention.  I decided to leave it more or less in “stock” form, adding only Accurail trucks, Intermountain wheelsets and Kadee couplers.  The car (by virtue of the date) is really too new for my era, however it will find a display spot in the train room and will likely be quietly added to an occasional train.  I’m thrilled to have this car, both for the memory of the convention and especially of Bill.

-Jack

New Cars, New Overpass

I’ve rambled about assembling a big mess of car kits in the last couple posts here and here, and I’ve mentioned something about assembling a Rix Rural Timber Overpass kit.  Here’s the manufacturer’s photo of that structure:

RIX Timber Overpass

I’ve finished building the kit and it is waiting for paint.  I’ve also been working on the supporting benchwork for the bridge and I’m close to fitting it into it’s final resting spot.  The section of mainline where this will reside is just a bit west of Willis.  I’m hoping to catch the feel of the Canadian National (formerly Illinois Central) mainline in south Brookhaven, Mississippi.  There the mainline enters a stretch where it’s running in a cut in the terrain.  At the middle of this stretch is an old timber roadway overpass, not unlike the Rix kit.  The prototype bridge is a bit longer than the model, as it crosses what was once a double mainline, but the kit still captures the flavor of the structure.  I’ve always liked that bridge and hope to make this one of the signature scenes on the layout.

As for the car kits, I’ve slowed down a bit on that.  I’ve completed about 30 kits, which sounds like quite a few, but is small relative to the number of kits remaining (something approaching 300).

I’ve got all the material on hand to commence conversion work on all those code 70 Shinohara switches.  I’ve just got to muster up the motivation to get started with all those re-buildings (one of the few things that I don’t particularly want to do).  Unfortunately, the local folks around here haven’t recognized that this is potentially one of the next great model railroads.  As such, no one is beating a path to the door for the chance to become involved in its construction (a sorry state of affairs).

biggrin

Oh, I’d like to acknowledge the superior customer service that I’ve received from Accurail.  While assembling a large stack of their kits, I came across a couple that had significantly rusted up screws (used for attaching the trucks and draft gear box covers).  I contacted Accurail and they immediately sent replacement screws . . . not the eight that I’d requested, but a bag of 100.  Within a few days of my initial contact, I had product in hand.  Now that’s service!  And those extra screws have come in handy for some of the older kits.  Those older kits utilize a molded pin on the draft gear box cover which holds the cover on by friction.  I’ve modified several of these kits by cutting off the pin and drilling a hole at that location.  I then used a screw to attach the cover, greatly increasing accessibility in the event maintenance is required.

As always, comments are welcome and visits are allowed (just drop a line).

-Jack

Rained Out

Yesterday Ron Findley and I joined a couple friends from Covington for a get-together at Tom Davidson’s home over in Hammond.  As many of you already know, Tom is a vast sea of knowledge about things railroad in southeastern Louisiana and southern Mississippi, especially when it comes to the Illinois Central.  Tom did a nice presentation on the railroad history in the greater Hammond area.  Of particular interest was the information presented regarding the strawberry shipments made from what was once known as “The Strawberry Capital of the World”.

Afterwards we had planned to shoot photos of several small industries and businesses around Hammond, but unfortunately the rains commenced.  Ron and I hung around for several hours, but it eventually sank in that this was not just a thundershower.  We relented and headed home.  We’ll simply return on a sunny day in the near future to complete our mission.

A few weeks ago I mentioned that I had started constructing a few easy car kits.  I’ve continued on that and now have a nice train full of new rolling stock added to the active roster.  I’m really enjoying this and I plan to continue assembling at least a few kits each month now.

A Group of New Cars Another Group of New Cars

As stated earlier, I won’t be detailing or weathering any of these cars initially . . . that can come later once the layout is operational.  However these cars are equipped with Kadee couplers and metal wheelsets.  Everything has been checked, adjusted and lubed so that these cars are ready for service.

I’ve also done a little more work on the assembly of the road bridge that I also mentioned earlier.  I’m assembling it in place so that it hopefully will fit the spot well when scenery work is started.  I’ll post a photo in the future once it’s completed and painted.

-Jack

Building a Few Kits

I’ve been wanting to take a break from layout construction lately and I had my chance while waiting for some critical material to arrive for the layout.  I decided I’d start assembling some of the several hundred car kits that I have stashed away.

I have kits from a broad cross section of manufacturers: Accurail, McKean, Bowser, Walthers, Branchline, Kato, Proto 2000, MDC, Red Caboose, Gould, (whew!) . . . at least another half dozen others.  I haven’t done any car kits in quite a few years, so I started with some simple Accurail boxcar kits.  Got a couple done and have a couple more in progress.  I also did a little tune-up on a couple cars already on the layout.

Workbench Project - Car Kits

My objective is to assemble the cars, add metal wheelsets (usually Intermountain) and Kadee couplers.  Everything is checked and adjusted so that the car is ready for service.  No attempt will be made initially to add detailing or weathering . . . that can come later once the layout becomes operational.

I also got started on a small timber road overpass that I’ll be needing soon.  The kit is by RIX and is typical of this type bridge.  The bridge deck has nicely detailed wood grain in it, but amazingly, the sides of the deck, and all of the piers are just slick plastic, ugh!  I spent quite some time scoring wood grain into all of the parts.  I used the back side of a no. 11 knife blade and scored considerably.  Then I lightly sanded over that with some 150 grit sandpaper.  The result looks fantastic, I think.  After I get the thing assembled, I’ll set about “creosoting” it using the photos I took recently on my field trip.

I enjoyed this change of pace and think I might add this to my regular project list.  I think the variety will help break up the monotony of roadbed and track.

-Jack

The Heisler is Back!

Back in November I wrote a post documenting the new Rivarossi Heisler that I’d just acquired.  I gave a brief description of the good (and not-so-good) features of the model, and mentioned at the end how I loved the whistle.  Well, the whistle turned into a bit of a problem.

I had noticed that the short whistle sound didn’t seem to match that of the long whistle (there are two buttons that control these sound variations).  Reading the instructions, I learned that there were actually six different whistles programmed into the thing, so I set about changing the whistles to see how each sounded.  While doing this, I noticed that one of the other whistles seemed to not match sounds between long and short toots as well.  After going back and forth, I finally realized that the short whistle sounds of these two whistles were reversed!  I wrote Rivarossi about this problem, and they in turn directed me to Matt Herman, who is the General Manager for ESU in North America (the loco uses a LokSound decoder by ESU).  Matt advised me to return the locomotive for reprogramming (which I did).  Well, it took three and a half months to get the loco back!  I suppose the timing couldn’t have been worse with all the things going on at ESU.  First there was a Christmas break, then a manpower shortage at the office, then ESU moved to a new building, and finally they hired more people, one of which was assigned to repair things.  But it’s here now, it works, and it works correctly . . . so much better!

This afternoon I set about customizing all the settings to my liking, a job made much easier using the latest version of DecoderPro.  This decoder is very complex, but as such it’s very powerful in it’s features and function.  For this reason I wanted the newest decoder definition and I wasn’t disappointed.  This definition is a vast improvement over the older version I’d had some limited experience with back in November.  I even figured out how to do some especially neat things with the decoder that aren’t even mentioned (directly) in the manual.  I’m going to have fun with this engine.  🙂

And to be sure, I’m still installing Tortoise switch motors.  I only have about four left to install though, and I’ll be caught up with the track that’s down.  I’m finally getting started on modifying all those Shinohara code 70 switches for DCC compatibility.  That’s one of those tasks that I really don’t want to do, and I’ve avoided it for many months now.  But trains ain’t gonna roll any further down the line if I don’t get this project done, so I just need to bite that bullet.

Oh, I noticed that this is my 100th post to the blog.

fireworks

Hmmm, is that applause or jeers that I’m hearing???

-Jack

Spencer Gets a New Heisler

Recently over on the Model Railroad Hobbyist forum someone had posted the topic “Locos you want to see produced?”  I had responded that I’d like to see a nice HO scale Heisler, and had mentioned that I wasn’t interested in the Rivarossi Heisler.  One respondent, Professor Klyzlr, questioned why I wasn’t interested in the Rivarossi model.  Since my opinion of the locomotive had been formed many years ago when the model was initially introduced, I decided to investigate the present state of the model before replying.

What I discovered was much more impressive.  In fact, during my investigation I found an especially good sale on one of the new sound equipped models and wound up purchasing the thing.

Rivarossi HeislerThis past weekend I put the engine through its paces.  Here is a brief summary of my initial reaction to the locomotive.

The good:  the model is much better looking than the original.  It has RP-25 flanges rather than the “pizza-cutter” flanges on the early model I had seen.  The couplers are now body mounted, rather than Talgo style (mounted to the trucks).  Most of the details are individually applied rather than cast on.  The paint looks good (though I’ll be re-painting it and adding decals for the Spencer logging operation on my pike).  It has a more refined, delicate look to it, and I’m pleased with its appearance.

The model now has a flat can motor (the original had the big 3-pole motor as I recall).  And it has the LokSound V4.0 sound decoder in it.  Running qualities are excellent.  It will really creep along at a pretty smooth pace.

The not-so-good:  The gear noise is disappointing.  The decoder’s sound levels have to be higher than I’d like so that they can be heard over the running noise.  I noticed while it was running very slowly that it has a slight bind in the running gear at the cylinders.  I will have to disassemble it when I get time and go over it carefully, cleaning up flash and burrs, and making sure everything is properly aligned and running as true as possible.  I might even put some Pearl Drops on the mechanism and run it a bit to see if that helps wear in the parts.  After cleaning, I will then do a good lube and see if that all helps smooth it out and quiet it down somewhat.

The decoder itself is jammed packed with features, and the overall sound of the engine is decent.  However, it is far and away the most complicated decoder I’ve ever seen to program, even using DecoderPro.  I’ve already invested quite a few hours fine-tuning the sounds and mapping the almost ridiculous number of sound effects to the various function buttons.

It is pulling nine cars up a 2-1/2% grade, and that without installing the (included) wheelset with traction tires.  That’s good because I’m looking for it to haul six (empty) skeleton log cars and a caboose up a 4% grade.

My overall initial impression: satisfactory . . . a nice model, and I’m happy to add it to my fleet.

-Jack

P.S.  Love the whistle on that thing!

More on Marcel’s Pulpwood

I’m reminded by Ron Findley that I’ll have to model a custom pulpwood truck for Marcel himself.  It will need the cab roof removed, effectively creating a pulpwood truck convertible.  It also should have twin holsters, one hanging on either side of the cab, to carry Marcel’s McCulloch chain saws.  He failed to mention the color of the cab though….more research will be required.

Also, an update for the pulpwood logs themselves: further reading and “measuring” indicates that logs (in my era) were typically 3″ up to 18″ in diameter, though could be significantly larger than that if the yard had mechanized loading of the cars (a crane or one of the new front end style loaders with a grapple).  Of course, since Marcel’s yard will be supplied by many independent truckers, the size of the logs they deliver will depend on their own ability to load their truck.  I’ve seen a few photos that suggest logs up to maybe 18″ diameter can be loaded if the truck has a simple crane on it to lift the logs.

Photo of Loading the Truck

This is good news, as I have quickly found that I will be chopping pulpwood logs for a looooong time if I limit the size to 12″ diameter as I initially thought I would.  However, many smaller logs are still needed as I’ve noticed in the photos that small diameter logs are generally used to “fill in the gaps” around the larger logs when loading the cars.  A recent chopping session (while watching a movie) only produced about an eighth of a car load….sigh!

Photo of Loading by Hand

I had originally estimated the height of the logs loaded on the woodrack car to be 8 feet.  This was based on the above photo (and a few other similar ones).  The Atlas car is a model of an older woodrack.  Upon measuring the bulkheads, I’ve found that the actual height of the loads will only be 6-1/2 to 7 feet….good news for the cutting crew!

– Jack