LCRR: Last Progress Report of 2022

Just a brief update on the restoration progress of the train room and shop, the last report of 2022. The doors and cased opening have been installed, as well as baseboards and window trim. Only a bit of shoe mold needs installation once the flooring is down. I pre-painted all of this trim, so only have to fill and touch-up the nail holes.

I’ve contacted several cabinet shops about building the new cabinets for the shop area. Hopefully I’ll have some prices coming in soon. One of the shops told me upfront that they were booked through April of 2023 . . . hope not everyone is that busy!

I made a brief visit to a flooring store to look into my flooring options. I have the unique problem of having to install flooring under the 44 legs supporting the layout. I can remove a leg at a time to facilitate that, but it does limit the type of flooring I’ll be able to use. Since the concrete slab is still covered with the adhesive from the previous commercial carpet installation (something not easily removed), it appears that I’ll be limited to something like floating LVT flooring “planks”. That’s not really a bad option, with the biggest difficulty being how to roll out the under-mat that I’d want to use with it. But I’ll continue this research after the holidays.

In the meantime, I’ve done quite a number of small tasks. While small, all were necessary. The biggest was to complete the electrical installation, with all receptacles, switches and cover plates now installed. I’ve temporarily installed the lavatory on the new cabinet in the restroom so that I could run water through the piping. This turned out as a wise decision, as last Thursday we had a huge cold front come upon us, with temps getting down into the low 20s. The cold is expected to remain for at least four days . . . something we’re not used to in the deep south!

Well, that’s it for now. I’ll post more updates next year as the last of the restoration takes place. Then I’ll turn focus back to building the train layout itself! 🙂

I hope all of you have a Blessed Christmas, and a Happy New Year!

-Jack

LCRR: Walls Painted

Yet another milestone has been reached in the flood recovery efforts: all of the building walls have been primed and painted. The shop (hopefully) will soon be receiving new cabinets. The floor tiles reveal the footprint of the original cabinets.

Shop: Painted
The shop walls (and the adjacent restroom) have received their paint.
Train Room: Painted
A typical view in the layout room. I painted these walls white to add brightness below the benchwork while working beneath the layout.

In addition to the cabinets, the next step is the installation of the doors, and the trim-out. Flooring will follow that.

LCRR: Drywall Installation Completed

A major milestone has been reached, with the drywall installation and finishing completed! In my last couple updates I showed hanging the drywall with the help of my (now) skilled helpers, Wayne Robichaux and Ron Findley. For the finishing, which included taping, floating and texturing (to match the upper half of the walls), I surrendered to a professional. I had spoken with a few pros several years ago, and none were interested in the job because of the extra difficulty of working below the train layout benchwork, and all the “special requirements” that I had. Fortunately I was able to find a fellow who was willing to undergo this project, and here are a sampling of photos to show the finished result.

Shop: Finishing Prep
A before photo of the shop, with only minimal taping of the joints.
Shop: Textured
And the finished walls of the shop.
Train Room: Finishing Prep
A before photo of the layout room, with only minimal taping of the joints.
Train Room: Textured
And the finished walls of the layout room.
Train Room: More Finishing Prep
Another before photo of the layout room, with only minimal taping of the joints.
Train Room: Another Textured
And the finished walls of this area of the layout room.

In a few more days (after I’m sure the texture is thoroughly dry and hardened), I’ll start the painting process with primer followed by a couple coats of color. At that point, only some trim will be needed to complete the walls.

LCRR: Final Sheet of Drywall Hung!

A milestone was reached on the Louisiana Central Railroad this week . . . the last sheet of drywall has been screwed to the walls! It was quite an adventure for this rookie and his able-bodied assistants (who were also rookies). But we got ‘er done! It’s not pretty, and there are a lot of gaps here and there, but it’s up, and it’ll stay that way.

The Last Sheet of Drywall
The last 8 foot sheet of drywall was split in two. The first panel is at the far end of this alcove, extending from the seam near the left leg, to the corner at right (virtually blocked in this view by the plywood “panel” on the leg-set). Most of the bracing has been temporarily removed from the leg-sets adjacent to the walls.
The Last Sheet of Drywall (close-up)
And here is the rest of the view. The first panel is at left, the second panel extending from the corner, right about ten inches past the photo edge. That electrical box was the last hole to be cut into drywall (whew!).

The next major step is the taping, floating and texturing of the drywall to match the upper part of the room. But first, there is plenty of preparation work to do. I have to tidy up and tape down all the plastic protecting the top of the layout. I also want to wrap all important things below the layout surface such as Tortoise switch motors, wiring junction points, throttle plug-ins, etc. I hope to avoid drywall dust getting onto and into these things. I am also considering wrapping all the leg sets to avoid spraying drywall texture on those as well. And finally, I want to eliminate as much “clutter” under the layout and aisles as possible to make access better, and to avoid the possibility of having everything covered in drywall dust.

I also have the restroom lavatory’s vanity “under construction” (it’s a kit, and I’m modifying and strengthening it). I hope to have it ready to slip into place as soon as the finishing is complete in the restroom.

There’s plenty left to do, but the first major milestone is complete! My thanks again to Wayne and Ron for their assistance in getting to this point.
Cheers!

For those new to the blog, you can see the post Rising From the Ashes (Part Deux) for a starting point to read the story behind this work.

LCRR: Recent Drywall Progress

Work is progressing nicely in the train room. I’ve had assistance this week from a couple friends, Wayne Robichaux and Ron Findley. Their help was vital in order to hang the 8′ widths of drywall. Saturday, unbeknownst to me, Ron recorded a few pictures of the work in progress.

Insulated Wall Waiting for Drywall
Ron made this image of the area where we were working before things got started.

Laying Out the Electrical Boxes
Here I am laying out the locations of the boxes for the electrical receptacles. This sheet alone had four boxes in it!
Cutting Out the Electrical Boxes
And now I’m cutting out the box openings. No, there is no toilet in the train room. This one will find it’s way back into the restroom once the walls are finished and painted. 🙂

Attaching the Drywall
A sheet of drywall being screwed to the studs.

The Drywall is Up!
This sheet of drywall is hung and ready for finishing. The rag is covering the electrical equipment and connections for one of the model railroad districts. It’s one of three equipment locations. The L-girder bracing on the wall side has been temporarily removed to allow better access to the wall.

We’re on the downhill part of the drywall installation now, with a 28′ long wall, and half dozen “short” walls left to complete. My sincere thanks go out to Wayne and Ron for volunteering to help me with this work.

For those new to the blog, you can see the post Rising From the Ashes (Part Deux) for a starting point to read the story behind this work.

LCRR: Repairs Started in the Train Room

Now that the drywall has been hung in the shop and restroom, I’ve turned my attention to the train room itself. This is where the challenge starts! All of the work must occur under the layout benchwork structure. Here are a few photos to portray what is happening.

Train-Room-Studs
Here is a what things look like at the start. The wall cavities have been cleaned as well as possible, and all lumber is sufficiently dried (as determined with a moisture detector). This is the view below the layout benchwork, with the wall side L-girder visible at the top of the picture. The wooden diagonal braces next to the wall have been removed, but the legs must remain. Fortunately the legs are a few inches away from the wall. I’m hoping that the aisle side diagonal braces (one shown here) can remain in place. We’ll see.
Train-Room-Insulation
The next step is adding the batt insulation. The diagonal metal strap is part of the sway bracing in the walls, a little extra rigidity for this large room with no interior bracing as normally provided by inside rooms.
Train-Room-Dry-Wall
Now with some drywall board hung. It is so nice to finally see a “real” wall. The first two sheets are up, only twelve more to go!

I’ve been preparing the other walls in the room as well, with all “cleaned” and ready for insulation and drywall. It’s slow going, but at least it’s going. 🙂

For those new to the blog, you can see the post Rising From the Ashes (Part Deux) for a starting point to read the story behind this work.

LCRR: First Progress Report

The restoration of the Louisiana Central Railroad model railroad hobby building (aka ‘the Train Room’) is progressing, albeit a bit slowly. But it is progressing. I’ve hung the drywall in the shop, entry and restroom, and here are the photos to prove it!

LCRR Shop - 1st Piece of Drywall
The very first piece of drywall in the shop has been hung!
LCRR Shop Area
This view is the shop area. There will be cabinets with counters below both of those wall shelves, their footprint to be within those bare concrete areas. The cabinet unit at right will have a small utility sink at the piping rough-in. The primary work area is also at right, with the fluorescent light above providing extra illumination.
LCRR Shop Foyer
Standing in the shop area and looking the opposite direction, we see the building entry door at left, the restroom straight ahead, and the entry to the train room at right. I had a few scraps of drywall left from my home flood restoration so I used them in this area (the reason for the different colors).
LCRR Restroom
Peaking in the doorway to the restroom, the lavatory will be here, the toilet to the right (out of this view).

There is still much work to do in these rooms to finish the drywall: the floating and taping work, and then texturing. But I plan to complete the insulation and drywall installation in the train room first. And I’ve started the prep work in there already (with a bit more to do), so should be hanging the rock by early next week.

For those new to the blog, you can see the post Rising From the Ashes (Part Deux) for a starting point to read the story behind this work. I’ll feature more photos of the restoration from time to time as the work progresses.

Rising From the Ashes (Part Deux)

Okay, I’m getting really serious about restoring my model railroad hobby building (aka ‘the Train Room’). Those who have patiently followed this blog for the past six years are likely rolling their eyes, as they’ve seen this before . . . perhaps twice before! But I am really going to make a concerted effort this time!

An explanation is in order to those relatively new to this blog. My town suffered a horrific flood on August 13, 2016. You can read the post detailing the flooding event here, and the aftermath (with photos) is reported here. I’ve posted since perhaps five or six times, giving updates to the re-construction efforts (or mostly, the lack thereof), the most recent being back in August of 2020. Read that posting to get a brief history of what has been done prior to the work recently completed.

I’ve been over to view and operate on the layouts of a few friends this past year, and it has had the effect of rekindling my interest in getting my own layout built and operating. And the persistent prodding of a few friends, along with offers to assist, has motivated me once again to resume this massive room restoration project.

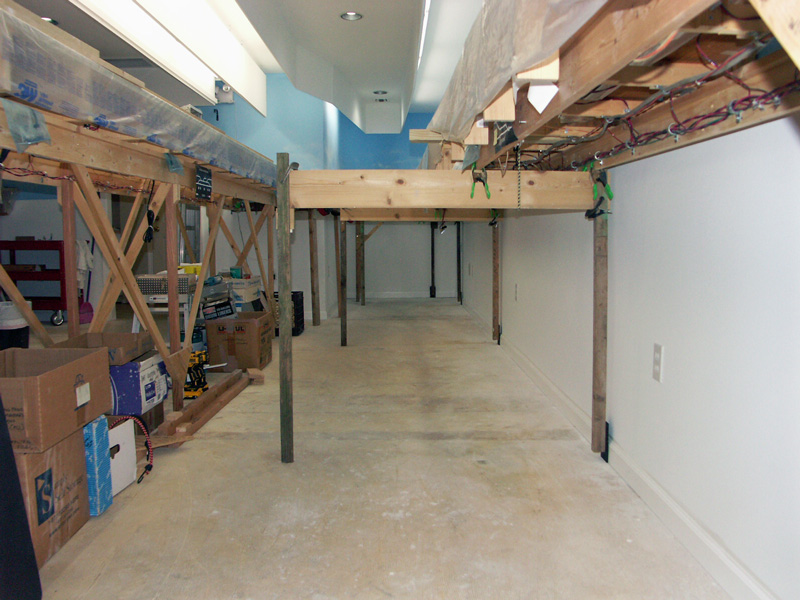
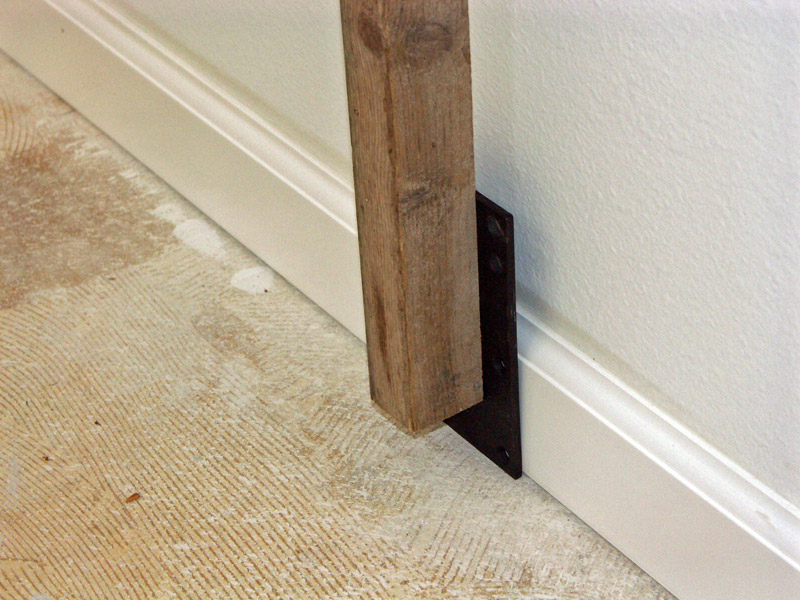
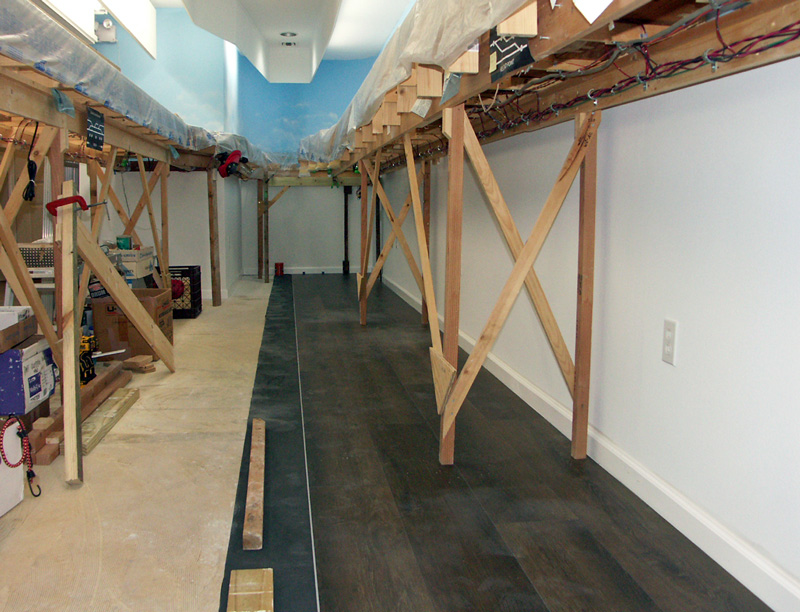
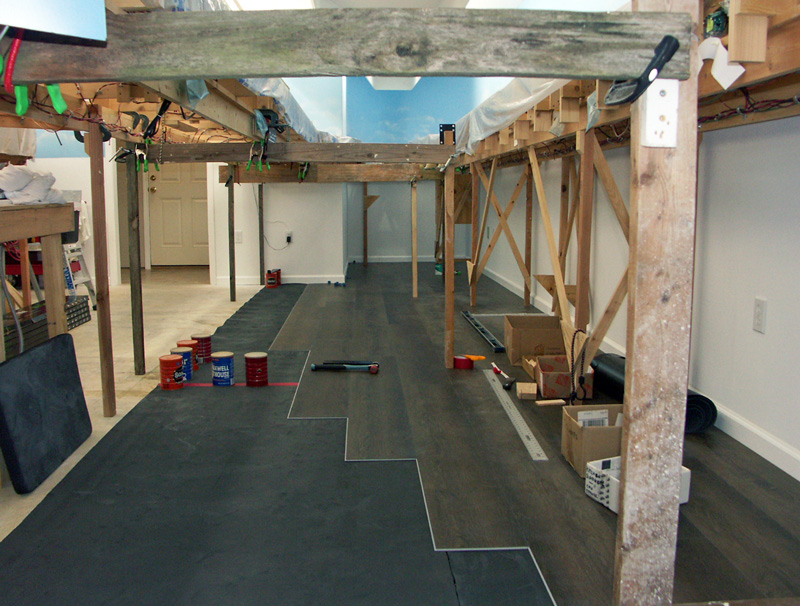
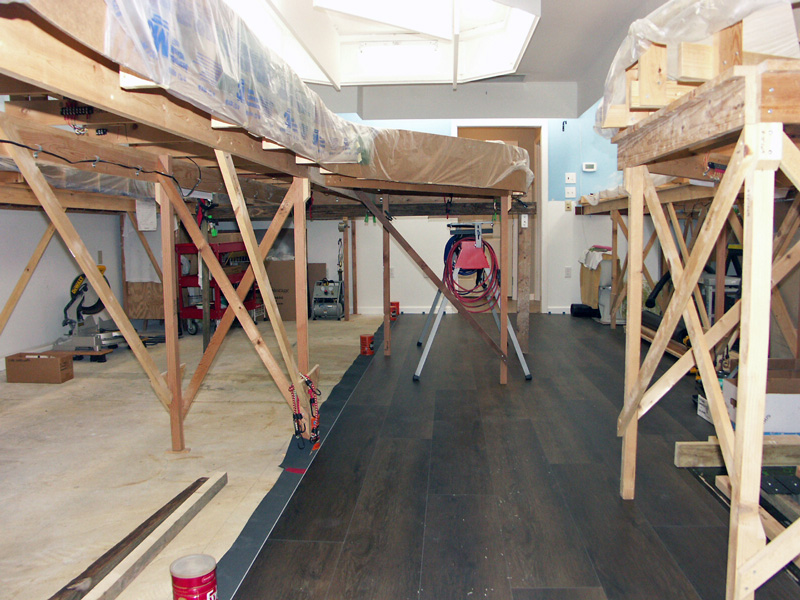
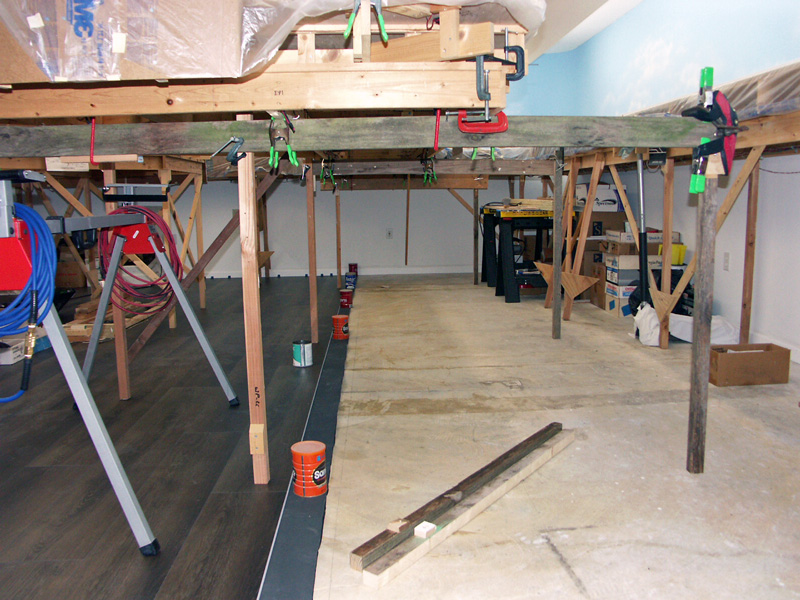
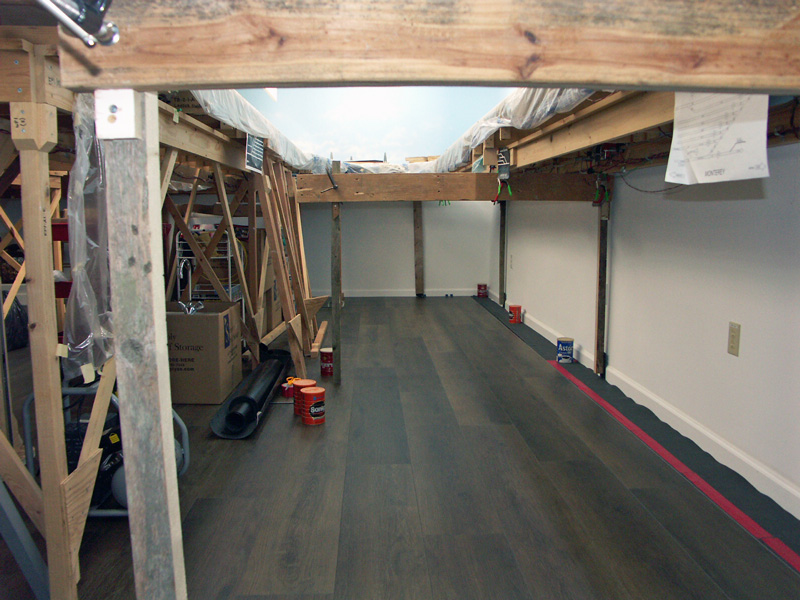
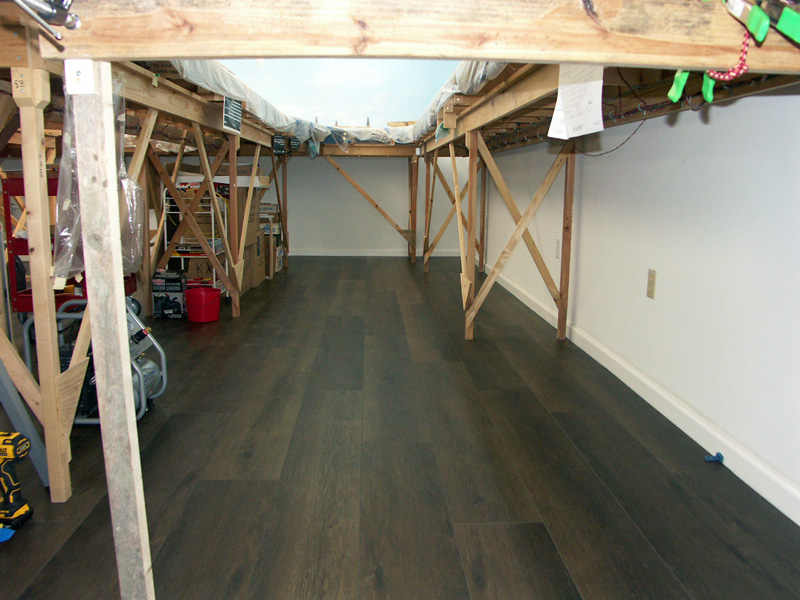
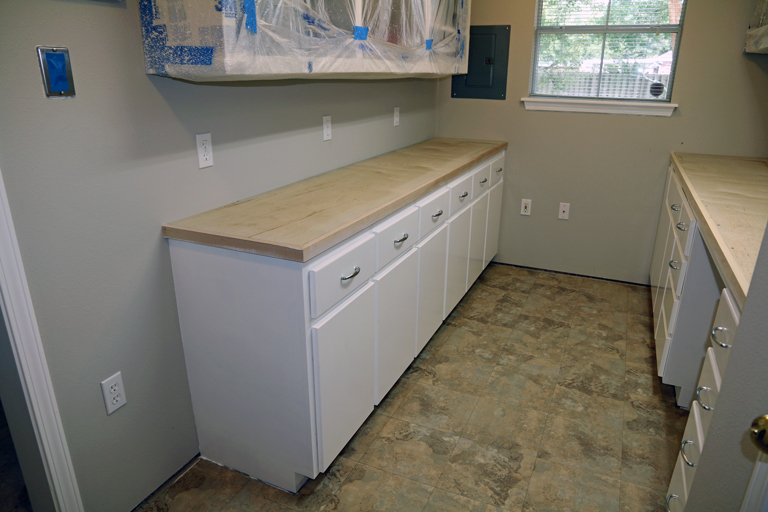
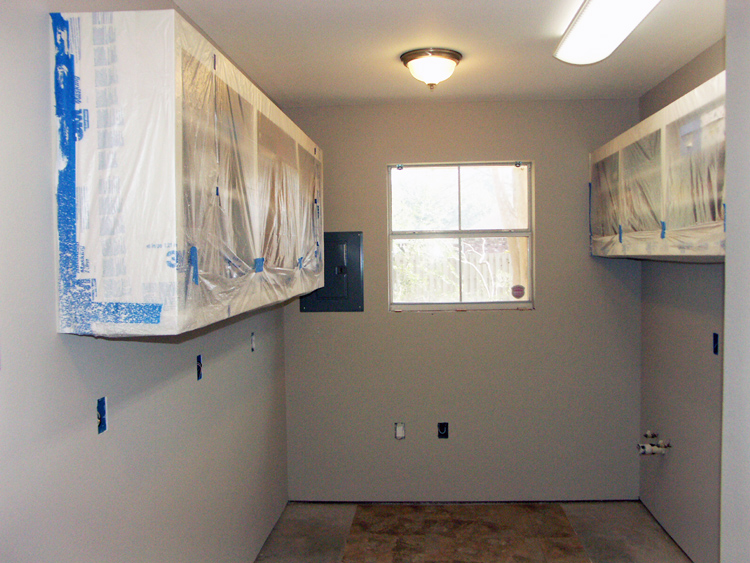
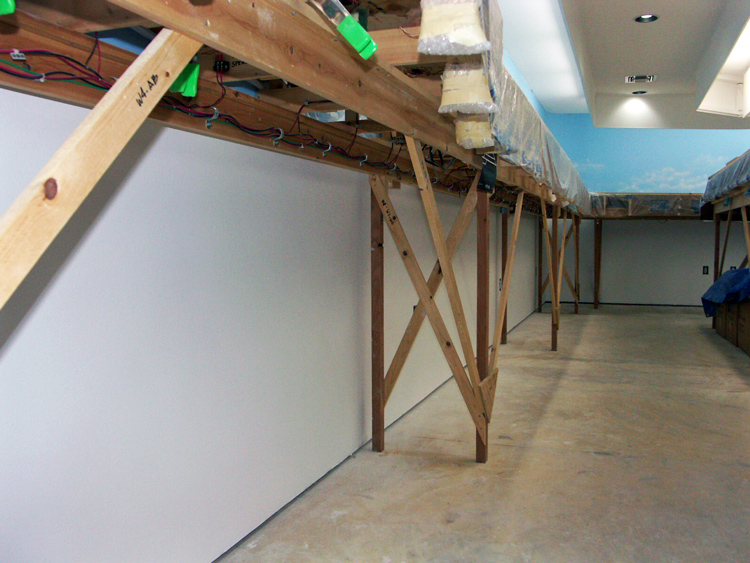
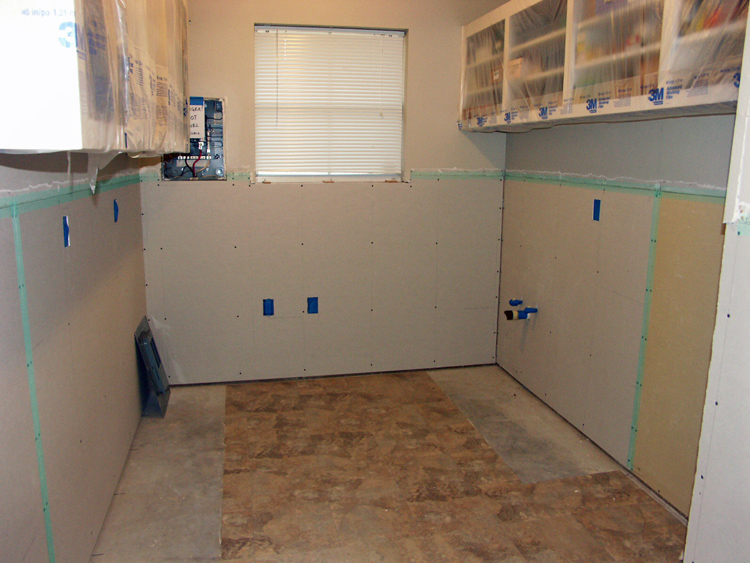
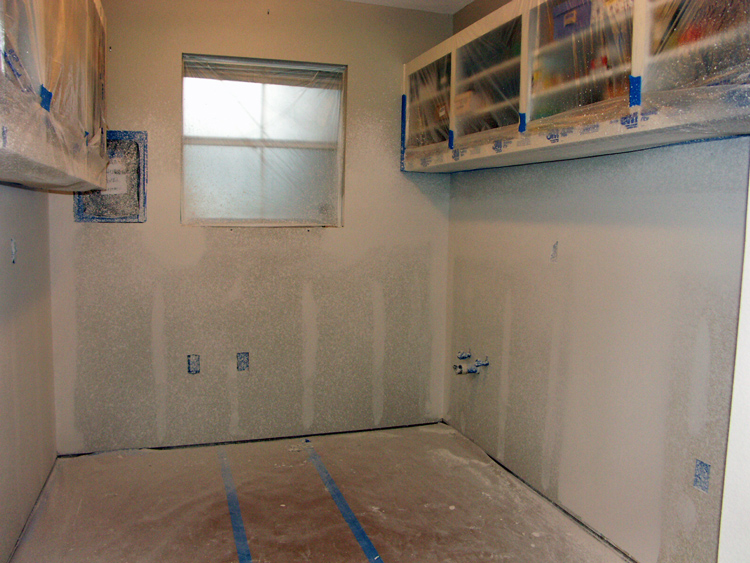
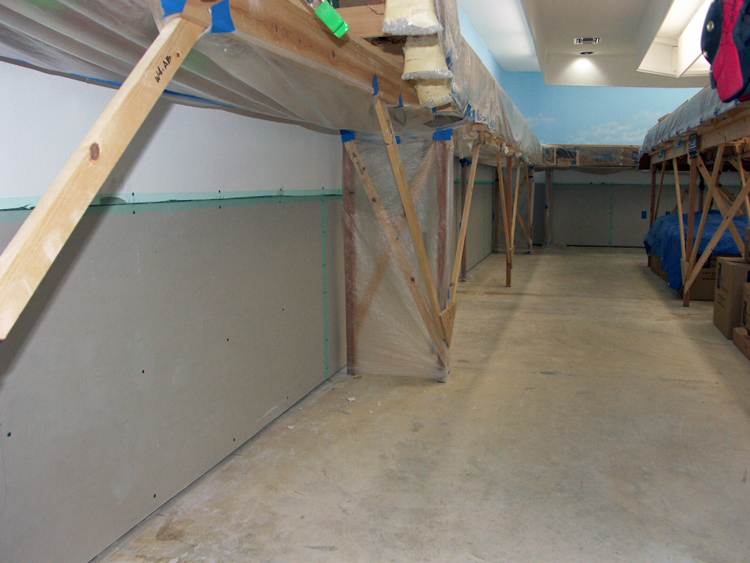
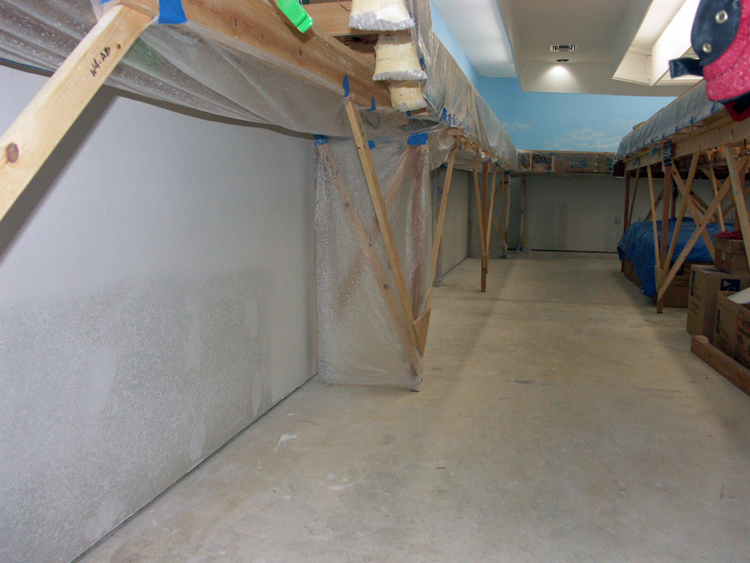
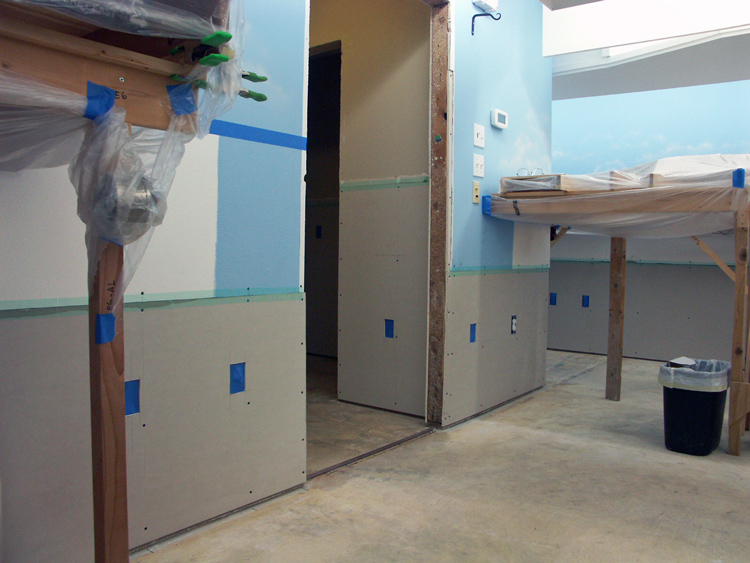
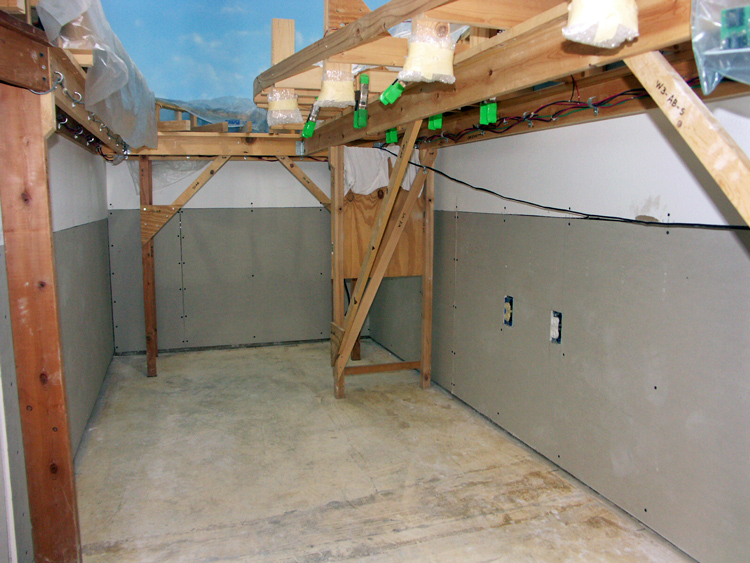
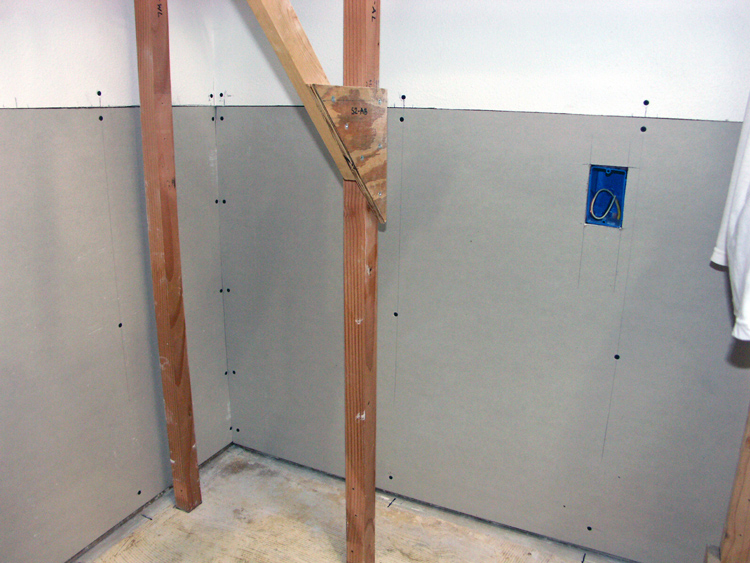
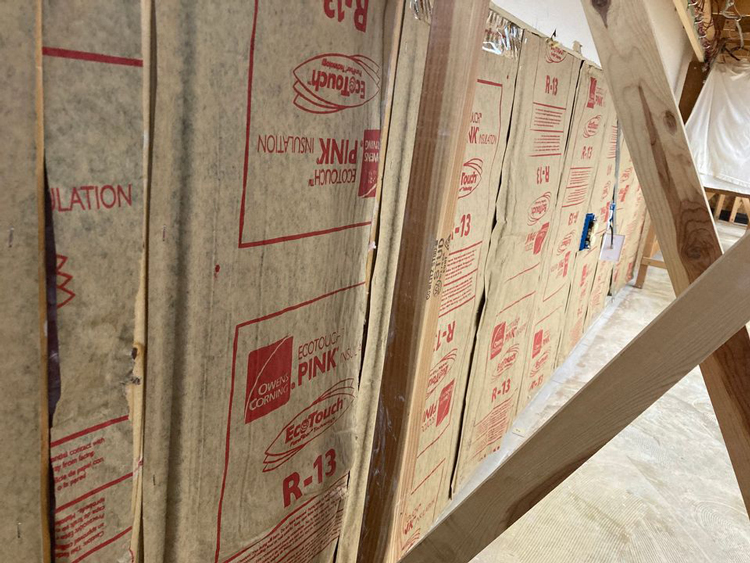
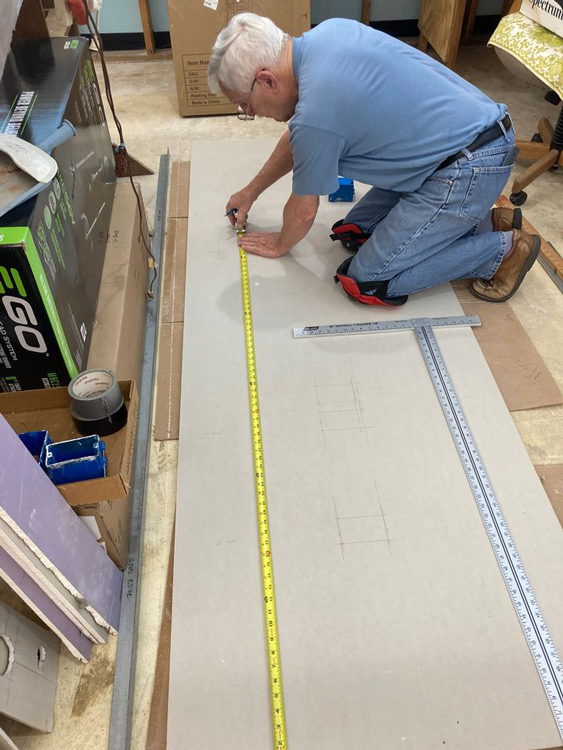
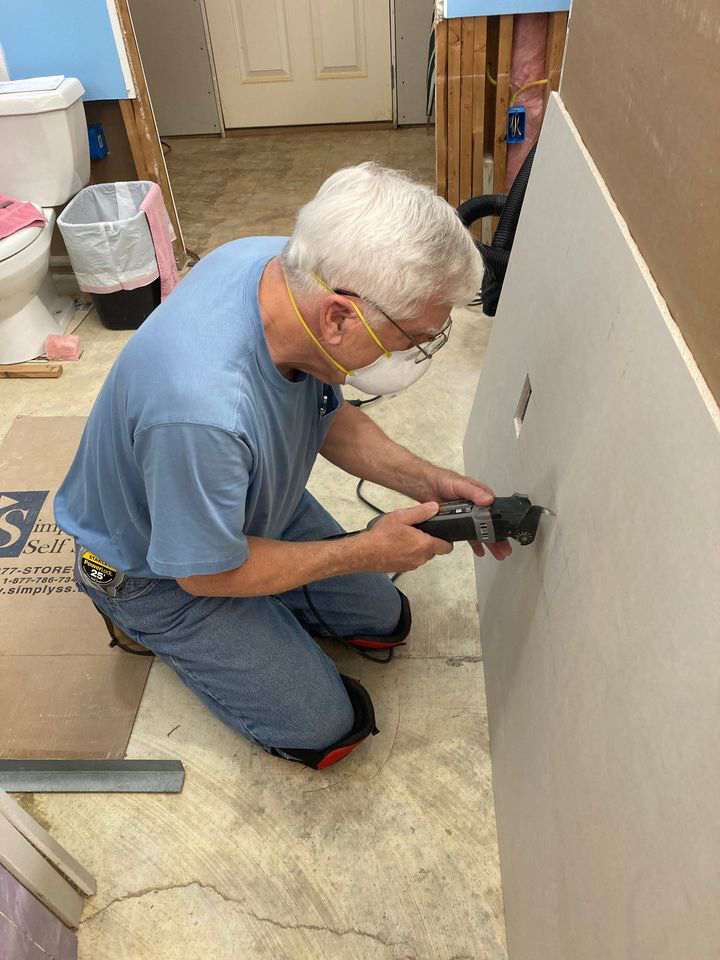
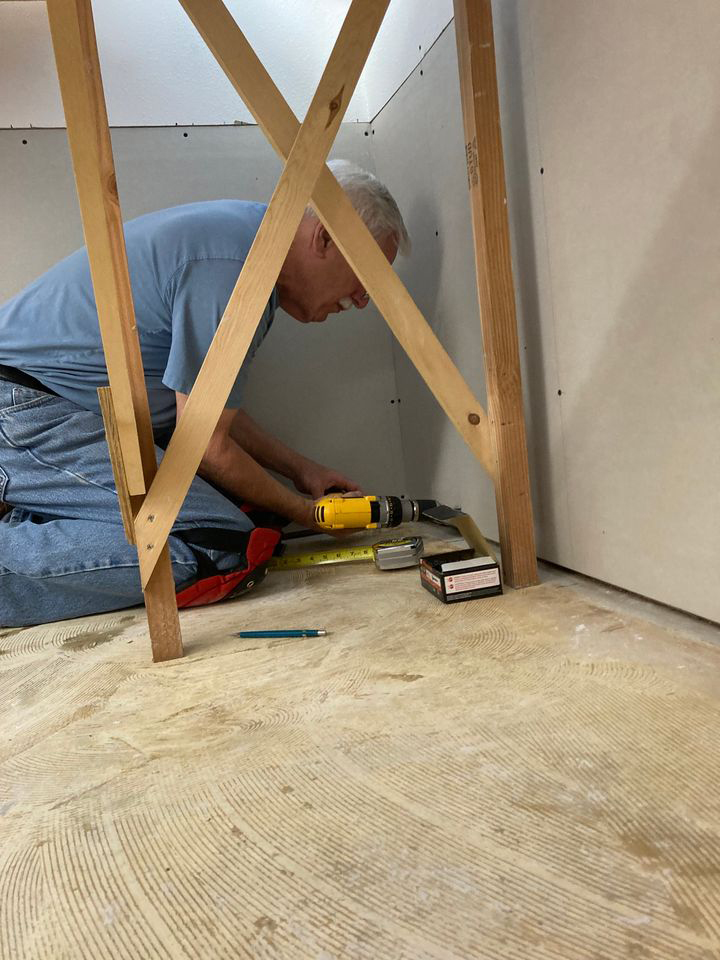
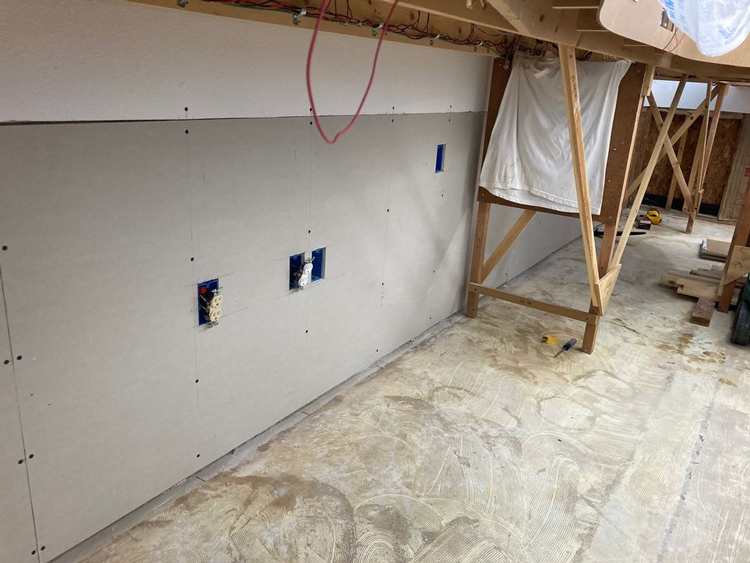
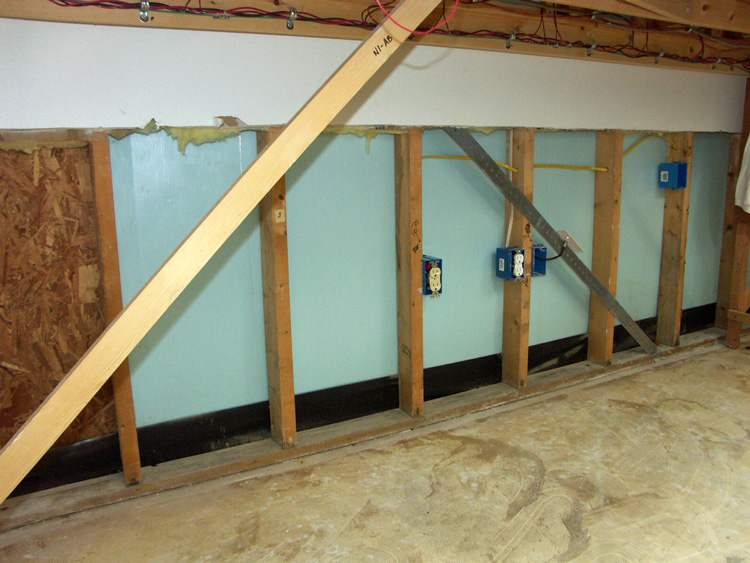
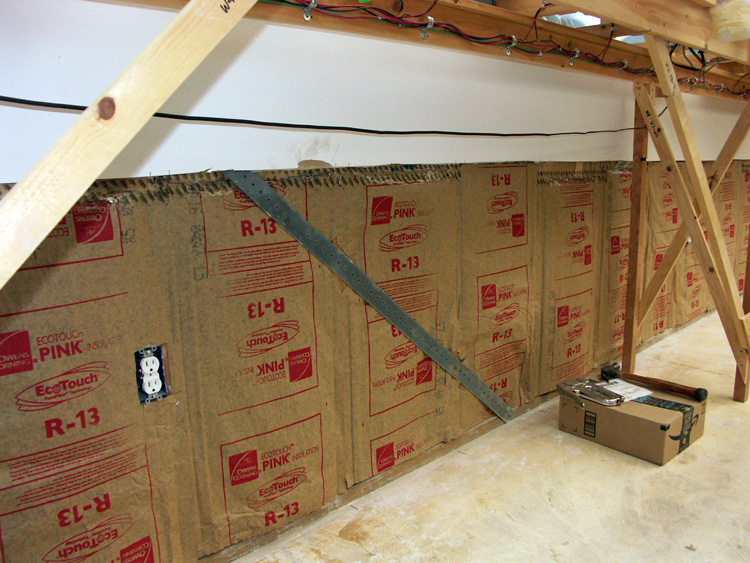
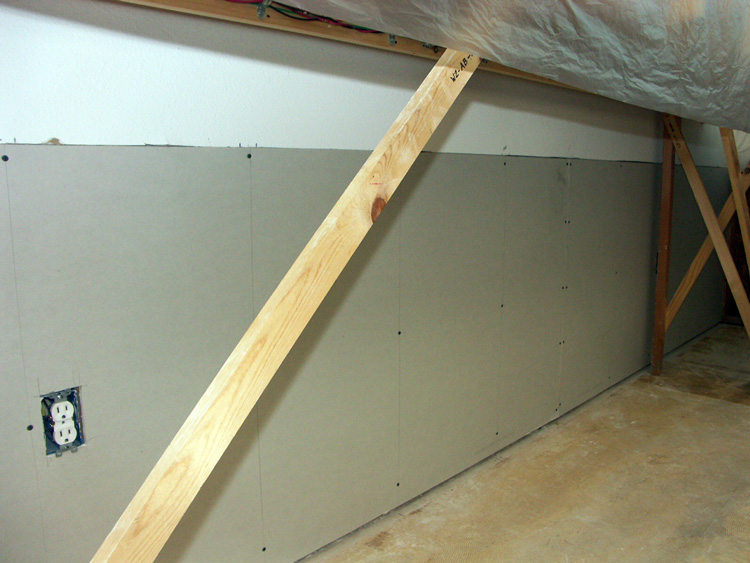
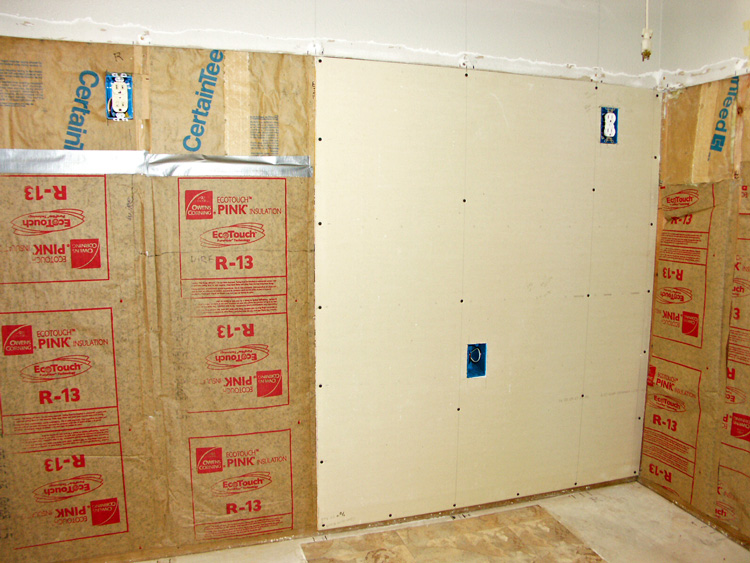
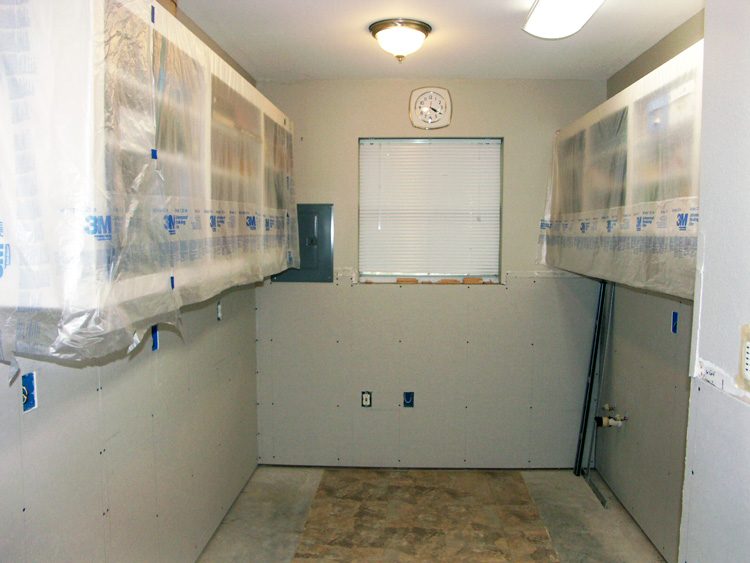
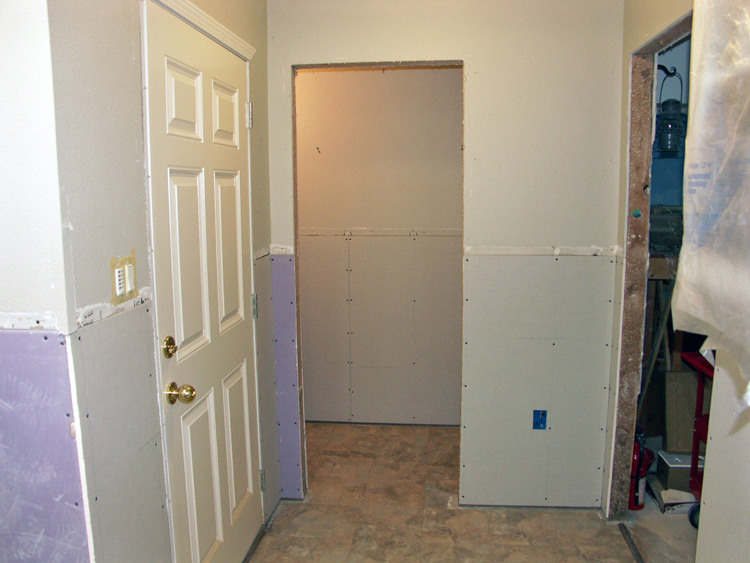
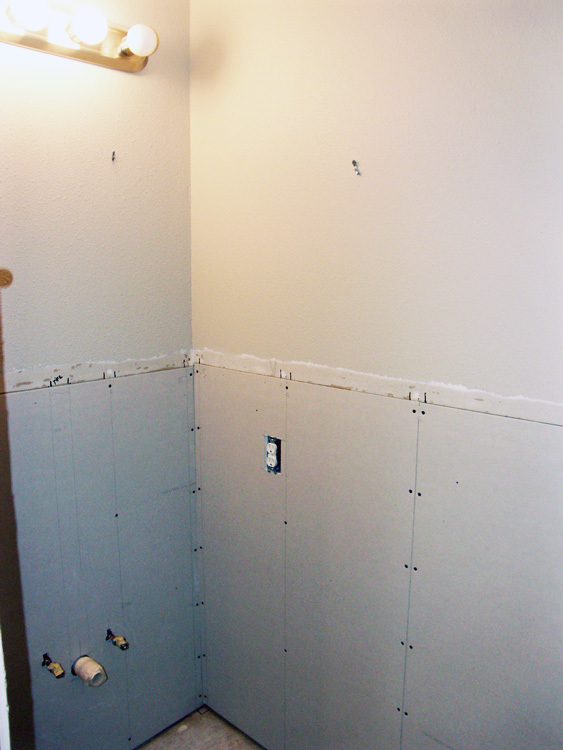
To that end, I have resumed the remaining demolition required before the actual re-construction can occur. Removal of the remaining existing drywall (sheetrock) has been completed, and there remains only a bit of cleanup along the joints. I’m planning to start installation of the wall insulation (already on hand) this week. And when that is done, the new drywall will be installed. I plan to do the shop area and restroom initially as they will be a bit easier to work with. That will also aid in my learning to install drywall (yes, this will be my first effort in that skill).

As regular readers know, I’ve been featuring a series of photographs, mostly of Jack Delano’s railroad photography during the WWII years. While I really admire Delano’s work, this is merely serving as “eye candy” to help keep the blog alive while the re-construction effort is taking place. My plan is to post occasional updates on the construction progress as it occurs. And I will still continue with the Delano posts, along with a couple dozen other photographs featuring a different railroad venue, so keep following along. And please be patient with me, and wish me luck!

-Jack

Rising From the Ashes

Okay, a bit melodramatic, but I’m happy and relieved to announce that the re-construction effort has finally started on the Louisiana Central Railroad physical plant (in other words, the building housing the railroad). For those of you that are relatively new readers of this blog, my town suffered a horrific flood on August 13, 2016. You can read the post detailing the flooding event here, and the aftermath (with photos) is reported here.

It took about 15 months to get my home restored and to move back in, then another year to get the place refurnished and back to somewhat the way it was before the flood. Then one thing after another stood in the way of working on the train building. But mostly, it was because I’ve had significant trouble mustering the will and energy to get out in the train building to do the work. But I’ve started the process, and hope to continue on a regular basis with the work.

Fortunately the building has been remediated, that is, the flooded areas of the building were removed right after the flood, including flooring, drywall, insulation, cabinets, etc. The building was cleaned up, sprayed for mold, and is thoroughly dried out. I’ve taken advantage of the walls being open below that level to add several new electrical receptacles (about ten in all) in places where I had wished I had some. I’ve also covered the entire layout with plastic to protect it from drywall dust. The work that I’m doing now is a little more demolition. I know that demolition doesn’t sound like re-construction, but what I’m doing is removing a bit more drywall to get it up to a joint at the four foot level. This should help ease the task of hanging the new drywall.

Progress may be erratic at times because I’ll be hoping to procure some volunteer labor to do some things that I won’t be able to handle alone (hanging the drywall is one of those things).

I’m still debating what flooring to use now. The original flooring was a commercial grade, short pile carpet glued to the floor. I really liked that flooring, but won’t be able to replace it, as there are now 46 legs supporting a layout in the way of installing another roll of carpeting. One option I’m considering is LVT flooring planks, installed as a “floating” floor. This, I think, would be doable, as I believe I could temporarily remove individual legs in order to install the plank below it.

Wish me luck!

-Jack

LCRR Status Update

A little news concerning the Louisiana Central Railroad: most of you know that my small city suffered a horrific flood back in August of 2016. My home and train building took on about 15″ or so of flood water. My house reconstruction has been long completed, but not so the train building. The carpet, millwork, sheetrock, insulation and cabinets have been removed, and the building has been dried out and sprayed for mildew. But other than roughing in for another 10 or so electrical outlets (might as well take advantage of the opportunity), no restoration work has been done. Truth is, I have really dreaded doing all of the work that will be required, and I’m just “burned out” with construction.

But the urge to resume construction of the Louisiana Central itself is still there, and is perhaps even stronger. As a result, I have taken the first step toward that end.

I had determined long ago that the first order of business was to completely clear the building of everything with the exception of the layout itself. I learned what an enemy drywall installation (and the incredible dust it produces) can be during the house construction. Therefore, everything that isn’t screwed down must be packed away and moved into storage. The building had become a huge warehouse during my home reconstruction. And it took quite awhile to empty it of all the boxes of “stuff” that was stored within. Indeed, there are a handful of household items still out there. And I have been working at removing these things for the past year!

But now it was time to box up all of the railroad stuff. And to that end, I finally got a start several weeks ago. My goal is to get out there several times a week and fill a few boxes, moving them to my garage for storage. I’m making progress, and have packed and stored quite a bit. To be sure there is much left to do, but I can see the progress, and that is encouraging me to persist.

Of course the layout itself can’t be removed. My plan is to try encapsulating it (as well as I can) with the plastic sheets that painters use for that purpose. Fortunately there are no structures or scenery yet (just track and bare benchwork), so I don’t have to worry too much about damage. My biggest concerns are the Tortoise switch machines and the wiring junctions at the various terminal blocks. I’m going to try wrapping the switch motors with plastic wrap, and perhaps also tape this over those wiring junctions. There are also three electrical backboards filled with circuit boards and wiring. I think I can completely encase them in plastic as well.

Once all of this is done, I’ll start the process of re-insulating the lower walls, and then hanging the sheetrock. The latter will be tricky, as I have to work behind the layout legs and bracing. I may be able to temporarily remove the bracing though since all screws are accessible from the outside.

And that’s where things stand at the Louisiana Central.

-Jack

Progress on Multiple Fronts

I have to admit that I’ve been in a rut for quite some time at least in regards to track laying.  And it all centers around the (self-imposed) requirement that all of the track switches are to be “DCC friendly”.  I’ve finally embarked on this project and can happily report that as a result, track work is again proceeding.  I’ve modified four of the Shinohara code 70 switches thus far, two of which have been installed.  The Illinois Central passing siding at Willis, and the interchange track to the Louisiana Central have been installed and are operational.  This completes the I.C. trackage.  The next two areas I want to complete are the L.C. passing siding at the Willis yard, and the Spencer Lumber Company’s line up to Camp 6 in the woods just east of Whitcomb.  The latter is necessary as it’s located at the far side of the benchwork in this area.  I want to get this installed and operational before advancing the Louisiana Central mainline (to be located near the aisle side of the benchwork) from Maynard to Whitcomb.

And since trackwork has resumed, I needed a fresh supply of refurbished and pre-wired Tortoise switch machines.  I grabbed another pile of those, performed the prep work, and now have them ready for installation.

I’ve decided to go with recessed control panels similar to what I mocked up recently.  There wasn’t much point to mocking up my other ideas as the recessed version was what I really wanted and the mock-up confirmed that the idea would be workable.  This past weekend Wayne and I cut out the components for the four panels that will be in the vicinity of Maynard.  I hope to start the actual construction of these panels within a week or so.  Once these are installed, I’ll be able to paint that section of fascia.  I’m studying color samples and hope to decide on a color soon.

I’ve also made a minor lighting change in the train room.  In addition to the fluorescent lighting behind valances, I also have recessed can lighting over the aisles.  These have had 75 watt incandescent lamps in them.  I decided to change the incandescent lamps out to 5000k LED flood lamps, the same color temperature of the fluorescents.  These match the layout lighting quite nicely and I think it will be a visual improvement.  I also installed a twin head emergency light fixture near the entrance to the room as when the lights are out, that room gets very dark (as in black).  Interestingly, the first day after I installed the light we had a heavy thunder storm pass through and the lights went out for a couple minutes.  The emergency light did an outstanding job of lighting the way out.

And finally, freight car construction continues, although at a slightly reduced pace.  I have about 45 cars assembled and checked out to be road worthy at this point.  Only about 250 kits remain.

-Jack

And More Painting…

OK, the view blocks have been installed and the overhead work is done!  I took a bunch of photos of the completed valence and view block installation . . . head over to the website if you’d like to gaze at them (the link is over there to the right).

So next up is my practice backdrop painting project.  This past weekend I dug out several hardboard background panels that I had used on my last layout many years ago.  I have about 32 lineal feet of 2 feet high backdrop to practice with.  Tonight I dropped by the Walmart and bought a quart can each of sky blue and flat white.  I’ll roll the blue on the panels at the end of the week and may even get some time to start spraying a few clouds on.

I’ll try a couple spray techniques using the stencils, and I’ll probably also try using an old paintbrush, sponges and anything else that I spy that may contribute to a credible cloud.  My plan is to just do a rather sparse sprinkling of clouds around the room; a group here, a group there.  I can always add more later if I decide I need more.  The main point here is to try to get some of the higher up painting done prior to putting up benchwork just to make things easier while painting.  I know I’ll end up sitting or laying on the benchwork later to do detailed painting such as hills, trees and such, so I plan to build a substantial framework to carry my portly self without fear of crashing through to the floor.

-Jack