A major milestone has been reached in the restoration of the Louisiana Central Railroad layout room with the installation of new flooring. Initially I’d planned to simply show a few snap-shots of the finished installation. But I then decided that maybe some would be interested in how the project was accomplished. So I’ve put together several photos that I took along the way.
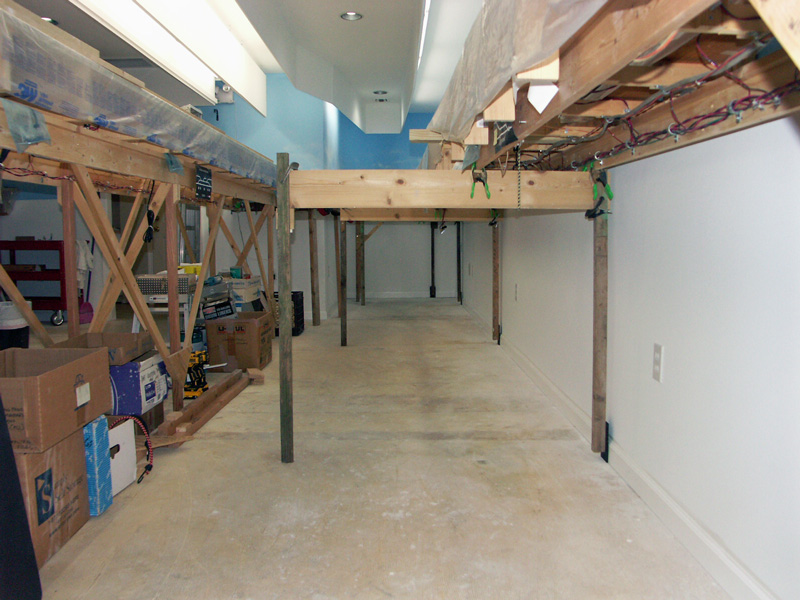
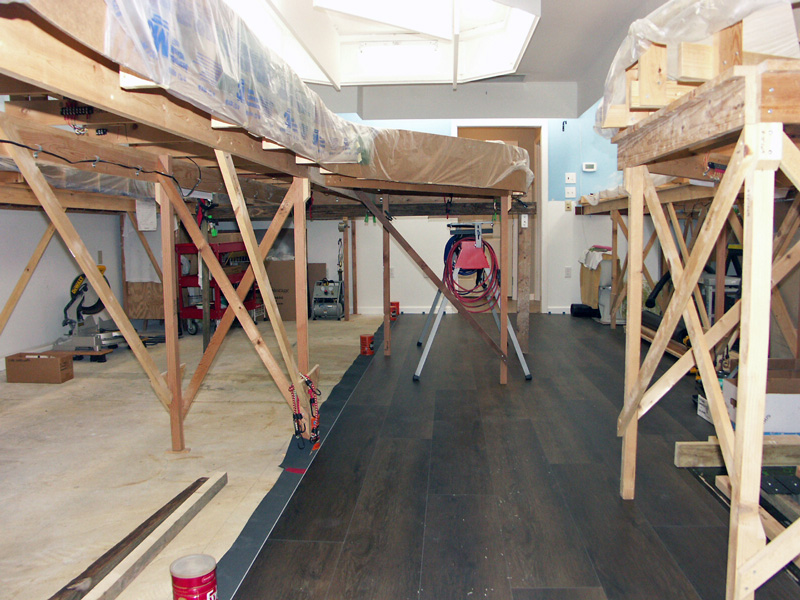
I had to install flooring in the room to replace the tight-pile carpet that was formerly in there. That carpet was pulled out after the Great Flood of 2016. But the hardened glue remained on the concrete slab, and I decided that it was impractical to remove after speaking with people with experience doing just that. Also compounding my flooring problem were the 55 legs supporting the layout benchwork.
I ultimately decided to use a “floating” floor of Luxury Vinyl Tile (LVT) as I reasoned that it could be laid over the glue. I also decided to use a foam underlayment with a vapor barrier on it’s bottom. I used a floor scraper to remove chunks of drywall mud, and to smooth the floor surface as best I could. The LVT “planks” I used are 9″ wide x 60″ in length. However I would have to provide temporary layout support to allow the 43″ width of the underlayment to be rolled out. I thought about how to do that for some time, and finally came up with a solution.
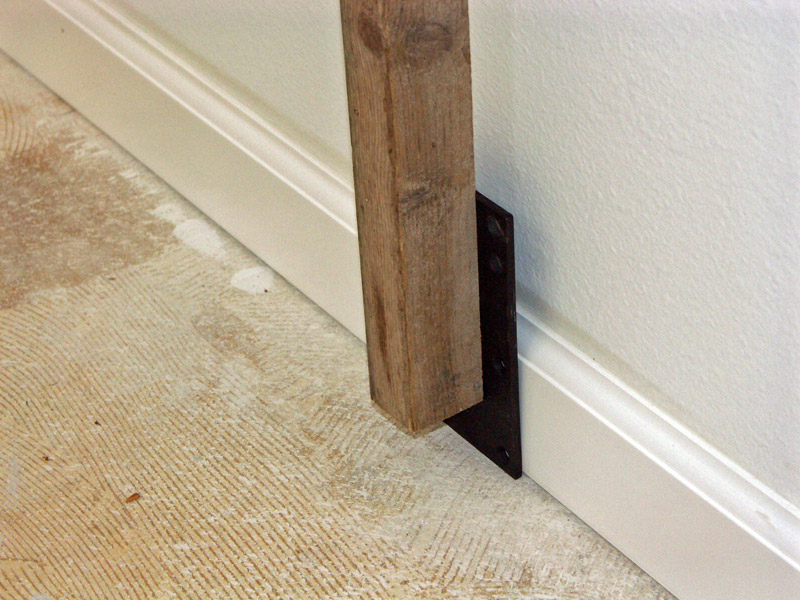
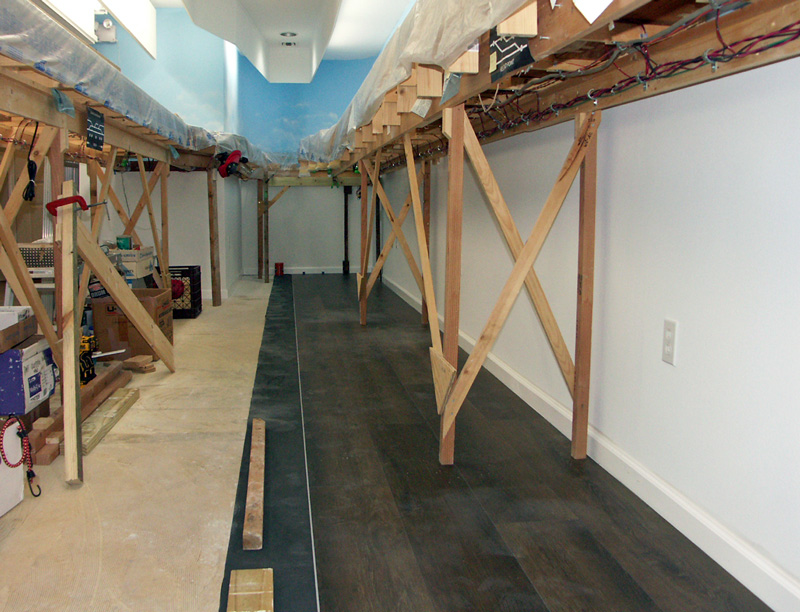
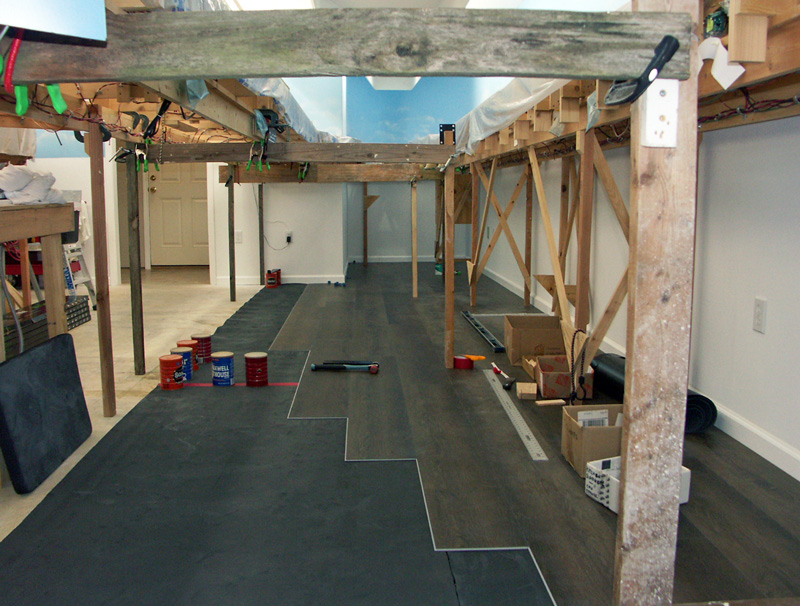
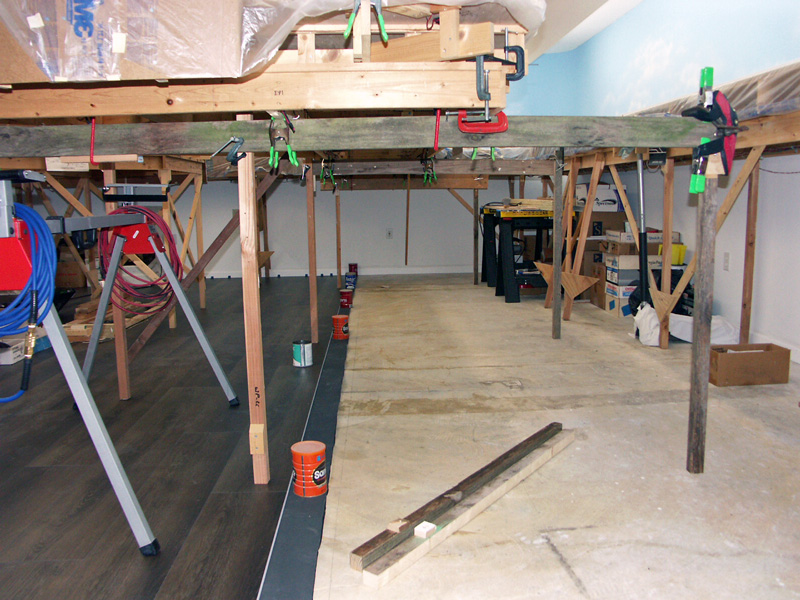
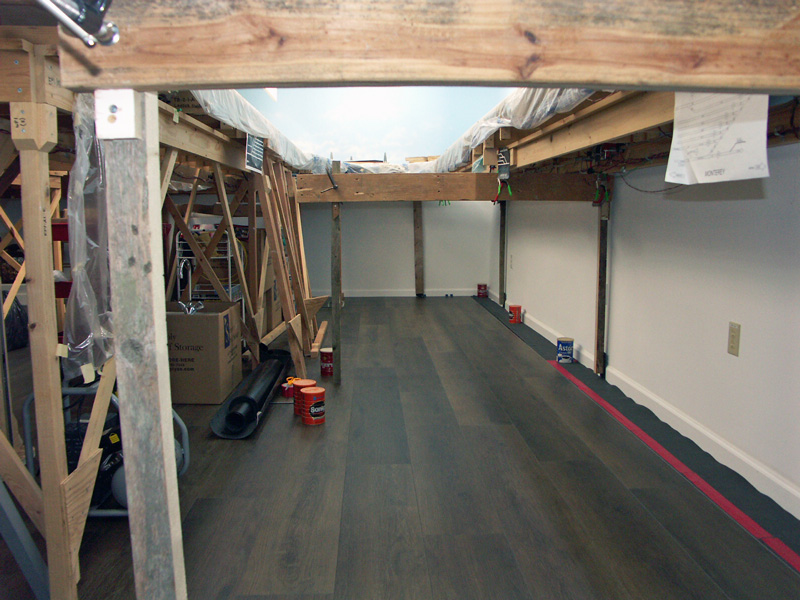
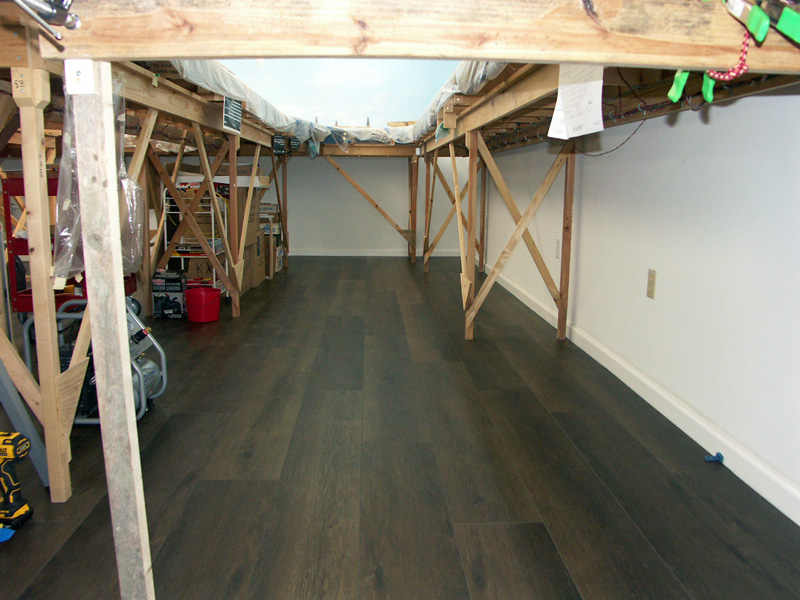
This view shows all of the permanent legs and bracing removed from a layout section along the wall, and the temporary legs and cross member set in place . The spacing is wide enough to allow for the 43″ wide underlayment to be rolled out. The legs against the wall have support plates attached, these explained in the next photograph.The first problem I had to overcome was how to support the layout at the wall side. Obviously I couldn’t have a leg where the flooring had to be laid. I also noted that the flooring requires a 1/4″ gap from the baseboard for expansion purposes. I pondered and prayed about this for some time, and this solution came to me. Those black steel plates are 3/16″ thick and they’re screwed to the wooden legs allowing the leg to be a couple inches off of the floor. With the plate against the baseboard, I’m able to lay the flooring and allow for my 1/4″ gap. The solution worked perfectly!I’ve laid four rows of LVT planks down, and I’ve started reinstalling the permanent legs and bracing. I’m holding off installing the bracing along the wall side to make installing the quarter round molding against the baseboard a bit easier. That molding will cover the expansion gap. When complete, I’ll add the remaining bracing.Here I’ve installed temporary supports across the aisle between benchwork sections, and extending under the edge of one of the two peninsulas of the layout. I’ll get five rows of planks down in this setting.I’ve gone to the other end of the room for this view. Here the planks have been laid completely beneath that first peninsula and are already up to the edge of the second peninsula. In the foreground the first temporary supports have been installed and will take things to the center of another aisle.And now I’m back at the rear of the room looking at the same area as the previous view.As the flooring advances, it’s necessary to keep relocating the temporary supports so that the next roll of underlayment can be rolled out. I’m ready in this view to do just that.We’re jumping nearly to the end here. The second peninsula at left is complete, and all the permanent supports are back in place. The final set of temporary supports span all the way across the aisle, beneath the benchwork and up to the wall. Note that only one row of planks remains to be installed.The last row of planks is down, and the flooring is done! I’ve reinstalled several permanent supports, and have a few more to go (one right in front of me).Going to the opposite end of the room again, here’s the view of the completed flooring. The temporary supports will soon be replaced by the permanent ones. As seen, much of the cross bracing hasn’t been installed to make it easier to access the wall for the installation of the quarter round molding that will overlap the edges of the new floor. When that’s completed, I’ll reinstall the remainder of the L-girder support bracing.
As you have probably imagined, yes, this was a massive undertaking. Over six weeks have been consumed doing this work (working 4-5 days each week). By far, most of the work was building up the temporary supports, removing the permanent supports, then reversing that after the flooring was down. I estimate that only about 20% of the time spent was actually installing the floor.
But I’m pretty pleased with the result, and hope I get many years of good service from this floor.
4 thoughts on “The Floor is Down!”
For the record, the room is 645 square feet.
-Jack
Yeah
Couldn’t have laid that last row without your help! Thanks!
-Jack
Glad to hear that Jack.
I have spent many hours on my feet helping friends and building mine.
My layout sets 42″ and half with 2′ width.
Learned a long time ago about those low standing layouts.
Bar stools are handy in my train room too.
Know you are just wanting to get back on track to build.
I am also now going to finish some too.
thanks,
Boudreaux