LCRR Avatar

About Jack Shall

I've been a model railroader and railfan for well over 60 years now. My interests lie in the steam era and the early diesel era. My modeling has been in HO, but I do have a closet interest in Fn3 :-) It's been a number of years since I've done any layout construction, and the new Louisiana Central pike under construction is by far my most ambitious effort. Follow along with me on this new adventure of the Louisiana Central.

Progress on Multiple Fronts

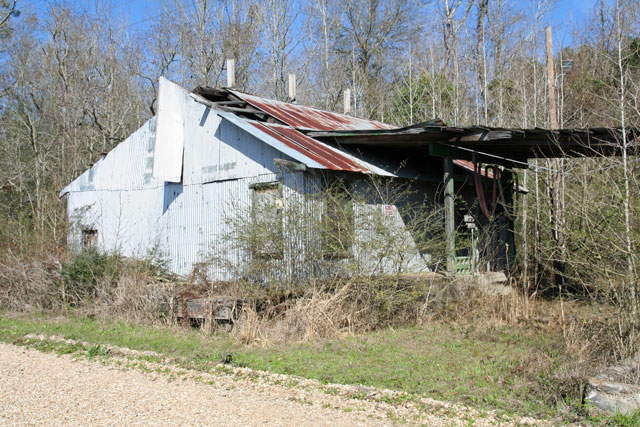
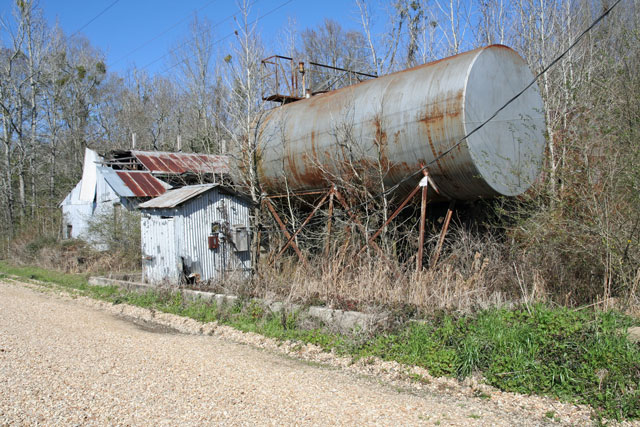
I have to admit that I’ve been in a rut for quite some time at least in regards to track laying.  And it all centers around the (self-imposed) requirement that all of the track switches are to be “DCC friendly”.  I’ve finally embarked on this project and can happily report that as a result, track work is again proceeding.  I’ve modified four of the Shinohara code 70 switches thus far, two of which have been installed.  The Illinois Central passing siding at Willis, and the interchange track to the Louisiana Central have been installed and are operational.  This completes the I.C. trackage.  The next two areas I want to complete are the L.C. passing siding at the Willis yard, and the Spencer Lumber Company’s line up to Camp 6 in the woods just east of Whitcomb.  The latter is necessary as it’s located at the far side of the benchwork in this area.  I want to get this installed and operational before advancing the Louisiana Central mainline (to be located near the aisle side of the benchwork) from Maynard to Whitcomb.

And since trackwork has resumed, I needed a fresh supply of refurbished and pre-wired Tortoise switch machines.  I grabbed another pile of those, performed the prep work, and now have them ready for installation.

I’ve decided to go with recessed control panels similar to what I mocked up recently.  There wasn’t much point to mocking up my other ideas as the recessed version was what I really wanted and the mock-up confirmed that the idea would be workable.  This past weekend Wayne and I cut out the components for the four panels that will be in the vicinity of Maynard.  I hope to start the actual construction of these panels within a week or so.  Once these are installed, I’ll be able to paint that section of fascia.  I’m studying color samples and hope to decide on a color soon.

I’ve also made a minor lighting change in the train room.  In addition to the fluorescent lighting behind valances, I also have recessed can lighting over the aisles.  These have had 75 watt incandescent lamps in them.  I decided to change the incandescent lamps out to 5000k LED flood lamps, the same color temperature of the fluorescents.  These match the layout lighting quite nicely and I think it will be a visual improvement.  I also installed a twin head emergency light fixture near the entrance to the room as when the lights are out, that room gets very dark (as in black).  Interestingly, the first day after I installed the light we had a heavy thunder storm pass through and the lights went out for a couple minutes.  The emergency light did an outstanding job of lighting the way out.

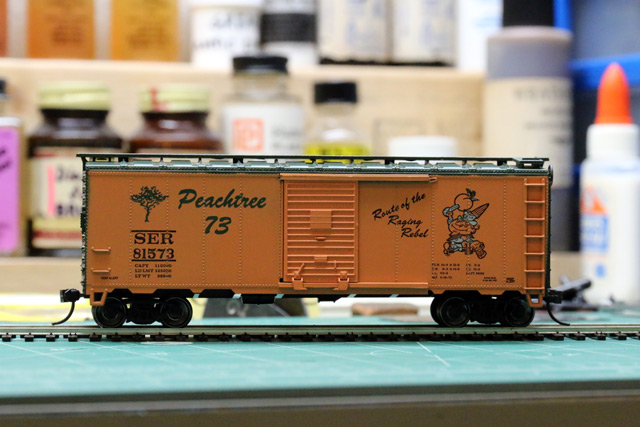
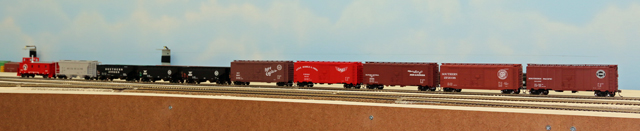
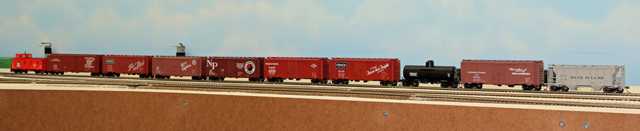
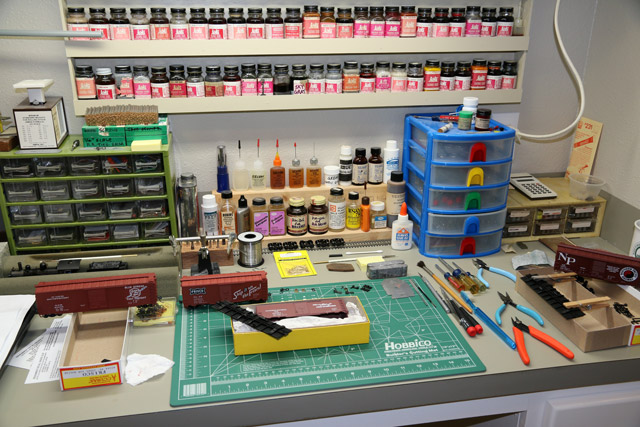
And finally, freight car construction continues, although at a slightly reduced pace.  I have about 45 cars assembled and checked out to be road worthy at this point.  Only about 250 kits remain.

-Jack

Dremel Tool and Bit Rack

Over the years I’ve acquired four Dremel Moto-Tools, each of which came with an assortment of bits, accessories, and tool parts.  And each time I needed a bit or accessory, I’d spend more time rummaging through the tools cases where the tidbits were stored than actually doing the work.  So I cobbled this rack together from “scraps of scraps” (literally).  I liked the finished result so much that I caved at the end and shot a coat of paint on the thing.

Dremel Bit Rack 1

Dremel Bit Rack 2

The blue plastic box came with my last motor tool purchase.  I simply screwed it to the rack and will use it to hold sanding drums, polishing pads, etc.

-Jack

Tracing the Louisiana Central

This past Friday Wayne Robichaux and I took another field trip. This excursion was a repeat of an earlier trip in which we had “followed” the Louisiana Central from it’s beginnings near the east bank of the Mississippi River, to it’s eastern terminus at Bude, Mississippi.  That trip was made in the dead of winter so that we would be able to see better into the terrain.  Friday’s trip found the landscape in full summer greenery.  While it was considerably more difficult to see beyond the edge of the road in places, the look is more akin to the way the modeled scenery will look as I will be placing the time period in the summer.

We were able to precisely discern several of the locations where I’d taken photographs several years ago.  However several other scenes I’d previously photographed were hard to identify this go-around due to the extensive foliage and because of the passage of time.  I re-shot many of the scenes as a comparison, but didn’t discover anything “new”.  While there are way too many photos to post here, you can see the original collection on the website.

We broke off late in the afternoon and headed over to McComb, where we caught the northbound Amtrak train, with a northbound CN freight hot on his heels.  As most of you know, a local railroad museum makes its home in the depot at McComb.  Outside, a former Illinois Central Mountain steam locomotive, along with a few cars, are on display under a shelter roof.  We were pleased to see that an extension of the train shelter is well under construction.  This will place the recently acquired passenger cars on display under shelter as well.  After checking things out, we drove south on Highway 51 to Hammond where we caught one additional train before heading back west to home.  It was an enjoyable day!

Progress on the layout was a bit light this past weekend, but I did manage to assemble a few more car kits.  I also painted a new rack I’m making that will hold Dremel bits.  Oh, and I finally got started on those code 70 turnout DCC modifications that I’ve talked about several times in the past.  I’ve got a pair ready for installation on the layout now.  If anyone shows any interest, I’ll have to take a few photos showing what I’ve done with them.

-Jack

A Control Panel Mock-up

I’ve been rolling ideas for control panels around in my head for several years now.  I’ve reached a point where I need to make a decision as to the style and construction I’m going to employ.  This past weekend I decided to mock up one of those panel ideas and here is the result.

Control Panel Mockup

This panel is a recessed version.  I think that this will help maximize the aisle width and also keep folks from accidentally rubbing up against the controls.  This panel is 5″ x 8″ and is typical of the size many of the panels will be.  I temporarily attached a section of Masonite to the edge of the benchwork, then cut the rough hole out for the panel.  Using 1″ x 1″ material, I “framed” the backside of the Masonite for the panel.  Using a router, I trimmed the Masonite flush with the frame, then screwed the panel to the back of it.

The panel itself is a sandwich of 1/8″ thick Masonite, a drawing, and some .093″ thick acrylic plastic.  I’ve used that method for panels in the past and they worked out well for me.

The “ghost” objects on the panel are merely reflections.  They seemed pronounced in the photo, but aren’t really noticed in person.

Opinions anyone?

-Jack

A Special Car

I just finished assembling this boxcar commemorating the 1973 NMRA National Convention in Atlanta.  My good friend Bill Williams had picked up this kit during that convention which he and I, along with a couple other guys, had attended.  Bill passed away a couple years ago and several months later, some other friends were liquidating a bunch of Bill’s railroad equipment during a railroading get-together and banquet.  We found this car in the box and I just had to have it.

SER Boxcar

The car is an old blue box Athearn that the NMRA had specially made up for the convention.  I decided to leave it more or less in “stock” form, adding only Accurail trucks, Intermountain wheelsets and Kadee couplers.  The car (by virtue of the date) is really too new for my era, however it will find a display spot in the train room and will likely be quietly added to an occasional train.  I’m thrilled to have this car, both for the memory of the convention and especially of Bill.

-Jack

New Cars, New Overpass

I’ve rambled about assembling a big mess of car kits in the last couple posts here and here, and I’ve mentioned something about assembling a Rix Rural Timber Overpass kit.  Here’s the manufacturer’s photo of that structure:

RIX Timber Overpass

I’ve finished building the kit and it is waiting for paint.  I’ve also been working on the supporting benchwork for the bridge and I’m close to fitting it into it’s final resting spot.  The section of mainline where this will reside is just a bit west of Willis.  I’m hoping to catch the feel of the Canadian National (formerly Illinois Central) mainline in south Brookhaven, Mississippi.  There the mainline enters a stretch where it’s running in a cut in the terrain.  At the middle of this stretch is an old timber roadway overpass, not unlike the Rix kit.  The prototype bridge is a bit longer than the model, as it crosses what was once a double mainline, but the kit still captures the flavor of the structure.  I’ve always liked that bridge and hope to make this one of the signature scenes on the layout.

As for the car kits, I’ve slowed down a bit on that.  I’ve completed about 30 kits, which sounds like quite a few, but is small relative to the number of kits remaining (something approaching 300).

I’ve got all the material on hand to commence conversion work on all those code 70 Shinohara switches.  I’ve just got to muster up the motivation to get started with all those re-buildings (one of the few things that I don’t particularly want to do).  Unfortunately, the local folks around here haven’t recognized that this is potentially one of the next great model railroads.  As such, no one is beating a path to the door for the chance to become involved in its construction (a sorry state of affairs).

biggrin

Oh, I’d like to acknowledge the superior customer service that I’ve received from Accurail.  While assembling a large stack of their kits, I came across a couple that had significantly rusted up screws (used for attaching the trucks and draft gear box covers).  I contacted Accurail and they immediately sent replacement screws . . . not the eight that I’d requested, but a bag of 100.  Within a few days of my initial contact, I had product in hand.  Now that’s service!  And those extra screws have come in handy for some of the older kits.  Those older kits utilize a molded pin on the draft gear box cover which holds the cover on by friction.  I’ve modified several of these kits by cutting off the pin and drilling a hole at that location.  I then used a screw to attach the cover, greatly increasing accessibility in the event maintenance is required.

As always, comments are welcome and visits are allowed (just drop a line).

-Jack

Rained Out

Yesterday Ron Findley and I joined a couple friends from Covington for a get-together at Tom Davidson’s home over in Hammond.  As many of you already know, Tom is a vast sea of knowledge about things railroad in southeastern Louisiana and southern Mississippi, especially when it comes to the Illinois Central.  Tom did a nice presentation on the railroad history in the greater Hammond area.  Of particular interest was the information presented regarding the strawberry shipments made from what was once known as “The Strawberry Capital of the World”.

Afterwards we had planned to shoot photos of several small industries and businesses around Hammond, but unfortunately the rains commenced.  Ron and I hung around for several hours, but it eventually sank in that this was not just a thundershower.  We relented and headed home.  We’ll simply return on a sunny day in the near future to complete our mission.

A few weeks ago I mentioned that I had started constructing a few easy car kits.  I’ve continued on that and now have a nice train full of new rolling stock added to the active roster.  I’m really enjoying this and I plan to continue assembling at least a few kits each month now.

A Group of New Cars Another Group of New Cars

As stated earlier, I won’t be detailing or weathering any of these cars initially . . . that can come later once the layout is operational.  However these cars are equipped with Kadee couplers and metal wheelsets.  Everything has been checked, adjusted and lubed so that these cars are ready for service.

I’ve also done a little more work on the assembly of the road bridge that I also mentioned earlier.  I’m assembling it in place so that it hopefully will fit the spot well when scenery work is started.  I’ll post a photo in the future once it’s completed and painted.

-Jack

Building a Few Kits

I’ve been wanting to take a break from layout construction lately and I had my chance while waiting for some critical material to arrive for the layout.  I decided I’d start assembling some of the several hundred car kits that I have stashed away.

I have kits from a broad cross section of manufacturers: Accurail, McKean, Bowser, Walthers, Branchline, Kato, Proto 2000, MDC, Red Caboose, Gould, (whew!) . . . at least another half dozen others.  I haven’t done any car kits in quite a few years, so I started with some simple Accurail boxcar kits.  Got a couple done and have a couple more in progress.  I also did a little tune-up on a couple cars already on the layout.

Workbench Project - Car Kits

My objective is to assemble the cars, add metal wheelsets (usually Intermountain) and Kadee couplers.  Everything is checked and adjusted so that the car is ready for service.  No attempt will be made initially to add detailing or weathering . . . that can come later once the layout becomes operational.

I also got started on a small timber road overpass that I’ll be needing soon.  The kit is by RIX and is typical of this type bridge.  The bridge deck has nicely detailed wood grain in it, but amazingly, the sides of the deck, and all of the piers are just slick plastic, ugh!  I spent quite some time scoring wood grain into all of the parts.  I used the back side of a no. 11 knife blade and scored considerably.  Then I lightly sanded over that with some 150 grit sandpaper.  The result looks fantastic, I think.  After I get the thing assembled, I’ll set about “creosoting” it using the photos I took recently on my field trip.

I enjoyed this change of pace and think I might add this to my regular project list.  I think the variety will help break up the monotony of roadbed and track.

-Jack

The Heisler is Back!

Back in November I wrote a post documenting the new Rivarossi Heisler that I’d just acquired.  I gave a brief description of the good (and not-so-good) features of the model, and mentioned at the end how I loved the whistle.  Well, the whistle turned into a bit of a problem.

I had noticed that the short whistle sound didn’t seem to match that of the long whistle (there are two buttons that control these sound variations).  Reading the instructions, I learned that there were actually six different whistles programmed into the thing, so I set about changing the whistles to see how each sounded.  While doing this, I noticed that one of the other whistles seemed to not match sounds between long and short toots as well.  After going back and forth, I finally realized that the short whistle sounds of these two whistles were reversed!  I wrote Rivarossi about this problem, and they in turn directed me to Matt Herman, who is the General Manager for ESU in North America (the loco uses a LokSound decoder by ESU).  Matt advised me to return the locomotive for reprogramming (which I did).  Well, it took three and a half months to get the loco back!  I suppose the timing couldn’t have been worse with all the things going on at ESU.  First there was a Christmas break, then a manpower shortage at the office, then ESU moved to a new building, and finally they hired more people, one of which was assigned to repair things.  But it’s here now, it works, and it works correctly . . . so much better!

This afternoon I set about customizing all the settings to my liking, a job made much easier using the latest version of DecoderPro.  This decoder is very complex, but as such it’s very powerful in it’s features and function.  For this reason I wanted the newest decoder definition and I wasn’t disappointed.  This definition is a vast improvement over the older version I’d had some limited experience with back in November.  I even figured out how to do some especially neat things with the decoder that aren’t even mentioned (directly) in the manual.  I’m going to have fun with this engine.  🙂

And to be sure, I’m still installing Tortoise switch motors.  I only have about four left to install though, and I’ll be caught up with the track that’s down.  I’m finally getting started on modifying all those Shinohara code 70 switches for DCC compatibility.  That’s one of those tasks that I really don’t want to do, and I’ve avoided it for many months now.  But trains ain’t gonna roll any further down the line if I don’t get this project done, so I just need to bite that bullet.

Oh, I noticed that this is my 100th post to the blog.

fireworks

Hmmm, is that applause or jeers that I’m hearing???

-Jack

The Field Trip Bonus

Wayne Robichaux accompanied me for part of my field trip last weekend.  We decided to head north up Hwy. 51 for a look at things between Hammond and Tangipahoa, Louisiana.  While we didn’t notice any older trestles or bridges to photograph, we did come across this old abandoned fuel oil dealership located a bit south of Amite.  This caught my eye as I plan to have a couple of these facilities on my new layout, one each at Monterey and Willis.

I took quite a few photos around the premises and thought I’d share a few of them here.

Here’s the overall view looking south east at the facility.  That’s a bi-level platform on the front of the building.  The CN mainline is about 25 feet behind my right shoulder.Fuel Oil Dealer - Looking Southeast

And looking east we see the loading shed for the trucks.  That’s the main pump house at right.  Note the small tank end in the distance.  This tank was separated from the three main tanks.Fuel Oil Dealer - Loading Shed

The loading shed detail:  the piping from each of the tanks rises next to the platform.  Each has a flow meter on it, then a hose and nozzle for filling the delivery trucks.  Note the supports for the missing signage at the roof ridge.Fuel Oil Dealer Shed Close-up

And finally, an overall view looking north east:  Visible here is the concrete dam built around the tank farm to contain any spillage.Fuel Oil Dealer Looking Northeast

This will aid tremendously in arranging at least one of my facilities.  Since the pumps and piping were still in place, I was able to discern the literal “flow” of the business.  My theory is that if you want to model a business or industry convincingly, you must understand the process or the flow of the business so that you can logically place the structure(s) and supporting elements.

As an added bonus to the day, we had six trains pass by while we were trackside (all duly recorded on silicon).  Taking a break from layout construction to do a little railfanning and research was what I needed.

-Jack

A Field Trip

Most of my readers are aware of the Canadian National (former Illinois Central) line that runs east from Baton Rouge to the connection with the north-south mainline in Hammond.  This line has been under an upgrade project for some time now, with lots of tie replacement, plenty of new ballast, and most significantly, the replacement of all the small wooden bridges and trestles to concrete and steel structures.  I had made a note to myself some time ago that I needed to photograph some of the old wooden trestles before they were demolished.  On a recent trip over to Hammond, I had driven down Hwy. 190 which parallels the line for much of it’s length.  I was shocked that only about a half dozen wooden structures remained, and those were grouped in a rather small area just west of Livingston.

So, this past weekend I grabbed the camera and set out to document these last few hold-outs while they still exist.  My aim was to not only document the structure, but to take some close up shots that I could use for detailing and creosoting (painting) these same structures on my own layout.  Here are a couple samples from the 60 or so images that I grabbed.

This is typical of the trestles left, a few are a bit shorter:CN Trestle

And a close-up view of a couple bents:CN Trestle Detail

This is a small “bridge” (actually, more like a big wooden box culvert):CN Bridge

Note the variations of color and texture on the wing walls:CN Bridge Detail

The day was clear and bright and I over exposed a bit because I wanted to get some of the color and detail beneath the trestles.  It is very apparent why most models painted flat black don’t look much like creosoted structures after you study these images.  Not only are the many colors apparent, black, grays, tans, etc., but the textures and streaking are very pronounced.  This should be interesting to try to simulate.

More later…

-Jack

Layout Construction Photos

I’ve completed a major reorganization of the Layout Construction Photos section on the main website.  As the layout has grown (and the number of photos has increased), I found it getting increasingly cumbersome to add material.  I originally started by adding photos in a linear fashion as I worked around the layout.  But as I started jumping back and forth to various layout sections, that approach wasn’t suitable.  I really wanted to keep photos of a given area together, but it was difficult to do that, and navigation through the photos was poor.  Now the photos are grouped, generally by the various areas of the layout that they pertain to.  Hopefully this will make things simpler for all of us.

I’ve had to rename a ton of files to accomplish all this.  One negative side effect though was that all of the links referring to the renamed pages had to change as well.  Hopefully, I’ve gotten them straight.  But if you find something out of order, please drop a line and point out the error.

I hope you enjoy the new format . . . let me know what you think.

Last Saturday I made the pilgrimage over to Hammond to attend the annual banquet of the Southeast Louisiana Chapter, NRHS.  As usual, I enjoyed visiting with the folks there, and after an excellent meal we had a nice presentation by Rick Pitcher on passenger service back in the “good old days”.  Afterward I spent a few hours over at the depot and managed to catch a few trains going by.  Another great day!

And I’ve installed a few more Tortoise switch machines on the layout.

-Jack